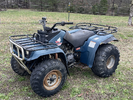
I recently picked up a Yamaha Moto4 ATV from the BST which is a 350cc made between 1991 and 1995. The seller had bought it from an estate sale and knew little about it, except when the starter solenoid was bypassed it cranked and ran. I rode it around his property and it shifted fine, seemed to have good power and ran well although it didn't always hold an idle, but it had been sitting who knows how long before the sale.
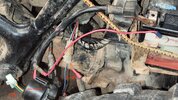
So I get it home and notice that the battery + lead is only connected to the starter solenoid and that's it, the rest of the bike is not getting power and the battery is not getting charged. The two "control" wires (3+4) of the solenoid were ripped off of it and it was impossible to tell what color they had been. Mega kudos to anyone who chooses to delve into this, lol!
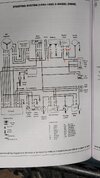
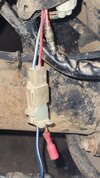
I've replaced the solenoid with a new amazon one (currently it's just dangling) and the colors from it don't match the diagram in the manual, and the colors from the manual don't match exactly the wires dangling from the bike either. As you can see there is supposed to be a blue/white (L/W) and a black ground wire as control inputs to the solenoid but the connecter coming from the bike is blue/white and red/white (3+4). What's worse is that the red/white wire of the 3/4 pair from the bike should be black to ground in the manual but I ohmed it out and it's not ground. Also the random red wire (5) tapped off of the main red from the battery was looped back to the battery when I got it, lol. I suspect that it should be connected to the un-numbered red and white wire dangling above the 3+4 connector in the pic. I didn't find any trace of the fuse holder shown in the diagram.
My big question is, should it be relatively safe to just connect things the way I think might be correct or in your opinion would I risk blowing out a transistor, etc. somewhere. I'm hoping someone here either has experience with something similar or could just offer general advice. Any suggestions are appreciated!


Last edited:
