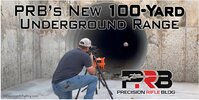
PRB’s New 100-Yard Underground Range

Get Off My Lawn

Artist formerly known as Pink Vapor
Supporting Member
Joined
Jul 1, 2017
Messages
15,908
Location
Wake Forest, NC
Rating - 100%
38   0   0
I believe some of y'all aren't a fan of this guy, I find his articles interesting. He's asking for feedback & ideas, I'll bet @Michael458 has a few thoughts.

20211228_073046.jpg
A decade ago, I was captivated by the article The Secrets of the Houston Warehouse, one of the most popular and most quoted pieces ever printed during Precision Shooting Magazine’s 56 years of publication. That landmark article, originally published in 1993, shared the findings of a group of Benchrest shooters who turned a vast Houston warehouse into a precision rifle laboratory.

The Houston warehouse had a 325-yard straight-away through the heart of it, which provided an ideal shooting environment – where the wind never blew, the rain never fell, the mirage never shimmered, and the sun never set. So began some of the most insightful and revealing experimentation into practical rifle accuracy ever conducted. Over six years, the levels of accuracy achieved in the Houston Warehouse went beyond what many precision shooters thought possible for rifles aimed shot-to-shot by the human eye.

The warehouse experiments reshuffled the list of what did and didn’t matter in precision shooting. They blew away many myths that had been long held by the shooting community (some still stubbornly held 30+ years later) and elevated other elements previously thought to be of no consequence. Their findings rocked the shooting community and continue to enlighten to this day.


Dr. Harold Vaughn also used a shooting tunnel to conduct his precision rifle experiments published in Rifle Accuracy Facts. Dr. Vaughn was a leading scientist at Sandia Labs and arguably contributed as much to our understanding of modern weapons and ballistics as any other figure in history.
“I have found the Tunnel Range to be essential in doing rifle accuracy diagnostic work because it eliminates the worst variable: wind effects.” – Dr. Harold Vaughn in Rifle Accuracy Facts
The Houston Warehouse and Dr. Vaughn sparked a dream that has been bouncing around my head ever since: that one day I might have access to a fully-controlled environment that I could use as a precision rifle lab to do my own experiments. I honestly doubted I’d ever get that opportunity, but I’m very excited to share that my dream is about to be realized.

PRB’s 100-Yard Underground Range​

Last year, I bought 10-acres just a couple of miles outside of town, where I’ve been building a home, a shop, and a fully-enclosed 100-yard underground range. That project has taken most of my free time – which is why I haven’t been publishing as many articles this year. It’s a huge investment, but I’m excited about what I’ll be able to do with a lab similar to the Houston Warehouse right at my house.


Doing experiments like my recent 6.5 Creedmoor match ammo test, my muzzle brake field test, or my massive barrel test that was published in Bryan Litz’s last book requires a lot of time at the range. I’m fortunate to have access to a private range that is just 25 minutes away from my home, but if you add up the round-trip drive time and typical setup/teardown, those things account for almost 2 extra hours each day that I did experiments. If I was out at the range and the wind ever got over 5 mph I’d pack up for the day to prevent the wind from skewing my results. In west Texas, the wind is always blowing! So I’m thrilled about what I could do with this underground shooting tunnel – especially one that is right at my house! I already have a long list of ideas for things I could test, and of course, I’d share the results with you guys.

I reached out to several experts in the industry who helped me with the initial range design, including guys at Applied Ballistics, Accuracy International, and other companies. Aaron Davidson from Gunwerks has built 3 shooting tunnels over the years to test their rifles, and when I asked him for advice for this project, he invited me to fly up to see all of them and experience shooting in them first-hand – and I took him up on it! Aaron graciously shared mistakes he’d learned the hard way, as well as construction drawings, equipment specs, etc. Thank you to all those guys who helped me out!

Now I need your help! I want to share what I’ve done so far and what I have in mind because I’m sure some of you may have experience in an area that could help. I’d love to hear what ideas or products I could use to make it better as I finish it out.

My underground range is basically two concrete rooms connected by an 8-foot diameter corrugated steel pipe.
I’ll first show you the plans, and then I’ll share some design choices I’m sure some of you guys may have questions about.

Shooting Tunnel
Shooter Room in Underground Range
Target Room in Underground Range
There is exactly 290 feet of corrugated steel pipe connecting the rooms, and the rifle and target are each offset 5 feet into their respective room, providing a total distance of 300 feet – precisely 100 yards. If I decide to move the rifle forward/backward for any reason, I could adjust the target’s location by at least +/- 3 feet without a problem, which is what the red “Target Area” is showing above. There is actually a debate about whether the distance should be measured from the rifle’s muzzle or scope (read more here), but I gave myself enough margin to do either. I didn’t want to make the concrete rooms bigger than needed, but I also tried not to hem myself in either.

Rifle Tunnel Underground Range
 
Last edited:
I hired a structural engineer to design how the pipe connects to each room, and you can look at the plans he drew up here. In short, we placed the pipe and formed up an 18” wall with rebar in it and poured concrete around it.

A friend that has been in the industry a long time and has seen a lot of firearm R&D labs made a suggestion for the shooter’s room that he referred to as a “gas expansion chamber.” The basic idea was to stick the rifle’s muzzle through a porthole into a small room just in front of the tunnel that is isolated from the shooter, and that would be the place that absorbs the brunt of the concussion of each shot. In my case, I plan to have plexiglass doors that I could close, and there would be portholes in the doors to stick the rifle’s muzzle through. Below is a diagram of the shooter’s room shown from above. (Note: I’m thinking the “expansion chamber” would extend into the area under the stairs.)

Shooters Room in Underground Tunnel Range
I plan to hang heavy acoustic blankets in that expansion chamber, and I also plan to add acoustic panels on most of the walls in the expansion chamber and the shooter’s room to absorb/dampen as much of the energy as possible. I’ve shot a magnum rifle with a very loud muzzle brake in an enclosed tunnel before, and it actually wasn’t as painful as I thought it might be. You might need to double-up on ear protection, but it didn’t give me a headache. My hope is the “expansion chamber” idea, along with the acoustic blankets and panels, will help make it more comfortable.

On the target end of the tunnel, I plan for my primary target area to be 3’x3’, as shown below. That would mean the bullet shouldn’t ever be closer than 2 feet from the tunnel walls, which seems like a reasonable margin of error. I can’t remember ever shooting at a paper target at 100 yards and missing the mark by 2 feet. You could fit quite a few bullseyes in a 3’x3’ area and not have to change out paper targets all the time.

Target View in Rifle Shooting Tunnel
Note: If you’re like me, you might be wondering how much of an arc a bullet has and if it’d ever get close to hitting the top of the tunnel. The peak of a bullet’s trajectory is referred to as its “Max Ordinate.” Even on something slow like a rimfire 22 LR at 100 yards, the max ordinate is less than 4” above the line of sight. So it doesn’t seem like that should be a problem.

Instrumenting The Range for Data Collection​

My goal is to be able to digitally capture as many stats as possible on shots fired in this tunnel, including velocity data and group size data. Because this is an indoor range, and I can do a permanent install (i.e., don’t have to set up/teardown each trip to the range), it seems like there are likely a few new options for how to collect live-fire data.

Electronic Target System​

First, I plan to invest in an electronic target system that could automatically provide advanced stats on groups (like mean radius, CEP, etc.) and save those digitally, without having to scan or snap photos of paper targets. Ideally, I would have a large screen in the shooter’s room connected to the electronic target to show the location of each shot and the overall stats. I believe some of these systems can also measure velocity, although I’m not sure how their accuracy compares to a Doppler radar. I know Mark Gordon from SAC uses a Silver Mountain G2 Electronic Target System, but I’d love to hear other suggestions for the best electronic target systems you guys are aware of that could do that. Please leave those in the comments.

Recording Velocities​

I hope to continue to record muzzle velocities using my LabRadar. One of the reasons I went with a large diameter tunnel was to increase the odds it would work accurately. Fortunately, a friend connected me with the inventor of the LabRadar, Guy Desbiens, before I started this project. While Guy couldn’t say for sure if the LabRadar would be able to capture accurate readings through an 8-foot corrugated steel pipe (kind of a niche scenario, I guess), he did graciously pass on a few tips for how to give it the best shot. Guy is the President of Infinition, and they don’t just make the LabRadar, but also very high-end Doppler radars used in government research. He told me the Infinition BR-3503 would provide very high-resolution readings and would for sure work because it is optimized to work over very short ranges, so it only needs a few meters to get a reading. In fact, it can even provide bullet measurements as it travels inside the barrel! But, that system costs around $50K – so I figured I should wait and try out my LabRadar first.
😉
I did go out and measure a few shots over my LabRadar once the pipe was in the ground, and it seemed to provide solid readings. Still, more testing would be necessary to ensure the signal-to-noise ratio is high enough to have confidence in the output.

If you know of good options for instrumenting this range, please let me know in the comments!

Why 8-Foot Diameter Corrugated Steel Pipe?​

I connected the two rooms with 16-gauge galvanized steel 3×1 corrugated culvert pipe, which had a 50-year coating on it to prevent the metal from rotting (and even longer in the semi-arid climate where I live). This thickness and 3×1 corrugation is very strong and is the same specs as what they use for drainage pipe under state highways where I live. I believe it’s stronger pipe than is necessary for this, but when the pipe manufacturer heard what we planned to use it for, they said if there would ever be a person in the tunnel, we’d have to use this 16-gauge steel with 3×1 corrugation. That higher rate of corrugation gives the pipe significantly more strength, and I’m sure they saw that as reducing their liability. Now that the pipe is in the ground and covered, I’ve driven over it many times with vehicles and a 5,000+ lb. tractor with no issues.

Laying First Pipe for Underground Range
The most common question you guys might be thinking is, “Why did I choose that over other materials or designs?” I considered a wide variety of options before settling on the corrugated steel pipe, including shipping containers, 3-4’ diameter concrete pipe, concrete box culvert, CMU block, and other options.

Examples of Other Enclosed Rifle Ranges - Lapua Shooting Tunnel
 
Most shooting tunnels I’ve heard about that are longer than 25 yards use either 3’ or 4’ diameter pipe made of concrete or HDPE (high-density polyethylene) culverts. That size and material might be the most economical way to go about it, but here are a few factors I considered that caused me to personally go with the larger diameter pipe:

  1. Safety: While there aren’t many of these tunnels in the world, as I talked to a few people in the industry about this project, I heard stories of at least two professional indoor ranges on different continents that burst into flames and had multiple casualties. The fires were so fast and hot that those inside weren’t able to escape. Did you know that some unburnt powder may come out of your barrel on every shot? When firing outside, the unburnt powder gets dispersed, blown away or buried over time, or otherwise contaminated where it doesn’t readily burn – but in an indoor range, it can accumulate over years. The theory is years of unburnt powder from hundreds of thousands of rounds fueled those fires. While I may never get to the round count that would cause enough build-up to be a fire hazard, cleaning and inspecting an 8-foot diameter tunnel seems way easier than a 3 or 4-foot diameter tunnel. I love to tinker and experiment, but clearly, none of this is worth dying over.
  2. Mirage: In Rifle Accuracy Facts, researcher Dr. Harold Vaughn provided an appendix on constructing a tunnel range. How helpful! Dr. Vaughn said, “Before building the tunnel range I had talked to several people with some experience with them, but no one seemed to say much about mirage problems, which proved to be nearly as bad as the wind. … When we watched through the scope we could see the reticle move up or down over a total distance of as much as 0.6 inches.” Dr. Vaughn went on to explain the lengths he had to go to in order to mitigate mirage, which was primarily due to temperature differences between the tunnel walls and free air inside the tunnel. To avoid those issues, I doubled the diameter of the tunnel AND buried the tunnel deep, with at least 3 foot of grade above the top of the tunnel. Dr. Vaughn’s tunnel was 4-foot diameter concrete pipe that they laid on the ground and then piled dirt on top of it (see photo below). That is likely why he said, “the top and bottom wall temperatures usually differ by 3°F to 4°F.” My pipe being 3-11 feet underground should result in much more consistent wall temperatures, and a larger diameter pipe should also reduce the odds that I’d be shooting through an area near the sidewalls with a significant temperature gradient, too. However, I am installing a large commercial-grade exhaust fan to move air, as Dr. Vaughn suggested, but that is primarily to prevent lead poisoning – not mitigate mirage.
    Rifle Accuracy Facts Shooting Tunnel
  3. Reflection Off Tunnel Walls: Could the tunnel walls somehow affect the bullet’s flight? Could there be some reflection or pressure nuances that might cause the bullet to fly differently than it would in the open air? I was worried about that, so I asked a couple of ballisticians. While it might be plausible if the tunnel was very narrow (e.g., 2-foot diameter) and the bullet traveled very close to the walls, the consensus was it was unlikely that reflection off the walls could impact flight in a 3-4’ diameter tunnel for bullets traveling at the muzzle velocities typical of centerfire rifles (2,500+ fps). Dr. Vaughn wrote about this, too: “The Tunnel Range may not work for transonic velocity (1000 to 1500 fps) projectiles because the normal shock waves will be reflected back from the tunnel walls to the bullet. This can cause instability of the bullet with large dispersion. We know that it doesn’t work for low or medium large-caliber bullets such as muzzleloader or pistol bullets because we have seen oblong bullet holes in the target.” Very interesting! To stay away from any possibility of the walls affecting the bullet flight, I went with an 8-foot diameter pipe. I may never test rimfire or subsonic rifles/ammo, but I didn’t want to write that off as a possibility.
  4. Flexible Shooting Distances: Because the tunnel is large enough to walk down, it would allow me to fire guns at shorter distances – not just 100 yards. If I want to shoot a rimfire or sight-in an AR-15 at 50 yards or get a newly mounted scope on paper at 25 yards – I could simply walk down and do that. I expect to shoot at 100 yards 99% of the time, but having the flexibility for other distances seemed useful.
  5. Target Access: The ability to walk straight downrange to change targets or double-check equipment will also be convenient. Most other tunnels I’ve heard about require you to go outside and walk around to access the target area through a hatch. I could even install a target retrieval system in the tunnel if I ever wanted to, but I think an electronic target system may make that a non-issue.

What Else Did I Consider?​

Why not concrete walls? While a 4-foot diameter concrete tube might be less expensive than the 8-foot corrugated steel, a concrete pipe that is 8-foot diameter is pretty rare and ridiculously expensive. Frankly, I don’t plan to shoot the tunnel walls. I was concerned about that at first, but thinking back, I couldn’t remember a single time I ever missed a paper target at 100 yards by 2 feet or more. When I’m mounting a new scope, I usually make sure I’m on paper at 25 yards before I move out to 100. I can do that above ground on my new property or go set up in the tunnel at 25 yards before moving back to 100. I also don’t plan to allow kids or novice shooters to shoot in my tunnel. I plan to have a setup above ground to check zero or fire at some steel targets out to 200 yards, and the tunnel is reserved for experiments and advanced shooters.

I initially considered building the tunnel using shipping containers (a.k.a. CONEX boxes) that would be welded together end-to-end. I liked the idea of a flat floor and oversized tunnel. However, burying a shipping container is more complex than it seems. While they’re designed to take a lot of weight in a stacked position, they aren’t built to take the pressure from the sides. When you bury them, there is significant pressure from the earth on the sides and top, so it’s wise to reinforce them structurally to prevent a cave-in. When you consider the cost of the shipping containers plus the expense to reinforce them structurally, it turns out the corrugated steel pipe was less expensive. Unlike shipping containers, the steel pipe is meant to be buried and has a 50-year coating that will keep it from rotting.

Building the whole thing out of CMU block (a.k.a. cinder block) or concrete would have been fantastic but significantly more expensive. Depending on what material you used, you might also have to take extra measures to seal out moisture, where the steel pipe is well sealed against moisture.

How’d I Connect The Pipe & Make It Water Tight?​

End-to-end the pipe measures exactly 290 feet, which combined with the 5 feet into the rooms on each side gives exactly 100 yards. There is a limit to the length of pipe an 18-wheeler can transport, so I had to buy the pipe in 7 sections, 2 that were 40-foot long and 5 that were 42-foot long for a total of 290-foot of pipe.

Aerial Photo of 100 Yard Underground Rifle Range

I obviously don’t want water to leak into the tunnel, especially since I’ll also have electricity running down it from the basement to the target room. The thickness of the steel and coatings on the pipe shouldn’t allow moisture in, but the connection points between sections of pipe is a weak spot when it comes to water penetration, so I had to be a bit creative to come up with a solution at those connections.

Along with the 7 sections of pipe I purchased steel connective bands that were designed to connect the 8-foot pipe end-to-end. However, this type of pipe is typically used for drainage culverts, so the connective bands aren’t made to try to make the connections watertight. After input from a utility contractor and someone who does coatings in the oil-field, we came up with a solution where we used the steel connective bands to connect the sections of pipe structurally, then we completely covered those with a 2 to 3-inch thick layer of closed-cell ground foam. Finally, we coated the foam with a polyurea liner.

Waterproof Coating On Shooting Tunnel Underground Range
 
The connected pipe was already laid in an 11-foot deep hole when we applied the foam and polyurea, so we weren’t able to get the very bottom of the pipe, so we plan to apply the same treatment all around the inside of the pipe at each connection point (both the closed-cell foam and the polyurea). That is likely overkill since we get less than 20 inches of rain annually in my area, but I just don’t want to walk in one day to water in the tunnel. Before we got the rooms built on both ends, we got rainwater and runoff in the tunnel, and it was NOT fun to clean out.

Ventilation​

Lead poisoning is a very serious concern for indoor ranges, which I didn’t realize until this project. Honestly, I’m not an expert in this area, so this is another area that I figured a couple of my readers might be experts in and could confirm whether I’m headed in the right direction or help me improve my plan.

Indoor ranges must mitigate the risk of lead poisoning with ventilation that moves air away from the shooting line at a recommended rate of 75 feet per minute (the equivalent of 0.85 mph), as well as regularly wiping down surfaces with special lead wipes and other things. The government has ventilation criteria for indoor ranges (read summary), and I figured it is wise to follow those recommendations.

A couple of industry pros told me with an indoor range it’s best to pull/draw the air with an exhaust fan near the target rather than pushing air from the shooter’s location. Trying to push air from the shooter’s location can cause air turbulence near the shooter’s position and possibly even cause a backflow of contaminated air.

Air Flow Calculation for Indoor Range
I did some calculations (see below) as to what it’d take to move 1 mph of air down an 8-foot diameter tunnel (i.e., 4-foot radius circular duct), and it looks like that volume flow is around 4,423 CFM. If you do the same calculation at NIOSH’s recommended airflow velocity of 75 feet per minute, you get 3,770 CFM.

Based on the recommendations I’ve got so far, I plan to buy a RuppAir DU240HRA commercial-grade exhaust fan, which is adjustable from 4,000 to 7,000 CFM. I thought it’d be better to have a margin of error on the upper end of the range in case I need more than I think – rather than get to the end of the project, and it isn’t moving enough air to keep me safe.

RuppAir-DU240HRA-Upblast-Exhaust-Fan.jpg

I plan to mount the upblast exhaust fan on the roof of the target room and have it perfectly centered with the tunnel behind the target to minimize turbulence near the target. I plan to have a wall switch in the shooter’s room to turn the exhaust system on or off.

On the other end of the tunnel where the shooter is, I have a 48” x 48” hole in the slab where I plan to run a fresh air duct that will draw air down into the basement from the northern-facing wall of my shop. My HVAC contractor initially calculated how large the fresh air duct needed to be, and he thought a 28” x 36” duct would be adequate. But, after he discussed it with an engineer, he recommended we upsize it to 48” x 48”. I guess like the exhaust fan, having more airflow if necessary is better than not having enough. If you are going to “fall off the log” one way or the other, it’s probably better to have more air than not enough.

I am thinking within the shooter’s room, I would split the fresh air duct into 4 registers (marked in the diagram below by the 4 yellow boxes, with the red line being the fresh air duct). The registers would be centered on the tunnel to try to prevent air turbulence near the shooting line. One downside of needing to bring in fresh air is that when it’s blazing hot outside or freezing cold, I’ll be drawing that air into the range. I plan to install a radiant heater above the shooter’s location to help make it more comfortable during the winter months and will use a fan in the summer months. I also thought this 4 register setup might allow me to shut the vents farthest from the tunnel if the air was too uncomfortable, and most of the air drawn downrange would be from the 2 registers in the expansion chamber area. Having 4 registers that could be adjusted independently might also help me fine-tune where the air comes from to minimize air turbulence. I figured I could use an HVAC smoke test to visualize how the air moves and make adjustments.

Fresh Air Registers In Underground Rifle Range
I do plan to have the switch to turn the exhaust fan on/off in the shooter’s room, so if it does cause air turbulence that I feel could potentially impact bullet flight, then I could switch it off to fire a shot and then flip it back on to clear between shots. However, I doubt that is necessary since we are only talking about 1 mph of airflow straight down the tunnel from the shooter to the target.

Ultimately, this is a sensitive part of the project because while I’m very excited about all of this, it isn’t worth risking my health over. If anyone is an engineer or HVAC professional that specializes in this area, please let me know in the comments if I’m headed in the right direction or what you’d do differently.

Bullet Trap​

Cleaning Lead From Traditional Ballistic Rubber Backstop Bullet Trap

I originally designed the target room to use a traditional bullet trap, as you see at a commercial indoor range, which is a berm of small, chopped pieces of rubber. However, as I learned more about those, I realized that as part of the long-term maintenance to keep the berm functional, you have to rake and maintain rubber levels and occasionally clean it by mining/separating the fired bullets from the rubber (maybe every 80,000 rounds). The process of separating the lead from the rubber can be a very specialized and time-consuming task. Often when a bullet goes into this kind of trap, it tumbles as it slows down and the lead core separates from the jacket, which means there is extensive lead exposure inherent any time you touch the rubber. In fact, cleaning the berm is so dangerous that everyone involved should be outfitted with a complete hazmat suit and certified respirators. That’s why it’s common for indoor ranges to contract this cleaning process to a third party that specializes in the process. This type of rubber berm also requires about 15-foot of space, which means the target room would need to be much larger – and since it’s a concrete basement, that means much more expensive.

The truth is I won’t be firing as many rounds at my private range as a bullet trap at a commercial range would need to support, so I started looking at other options like a total containment trap using steel deflection plates and other solutions. Those only need about 8 feet of space, which is much less than a traditional rubber berm, but it’s still quite a bit more than another solution I found.

After a lot of research, today, I am leaning toward simple ballistic rubber blocks. I’d seen those before at SHOT Show but really didn’t understand the benefit of them. The way I understand it, unlike most other bullet traps, ballistic rubber virtually eliminates ricochet and splatter and reduces airborne lead by 99%. That’s because when a bullet hits this bullet trap, it gets fully encapsulated, and the lead core never has a chance to be exposed.

Ballistic-Rubber-Block.jpg
 
These ballistic rubber blocks come in various dimensions, but I’m leaning towards something like Range Systems Dura-Bloc, which is 24” wide x 12” deep x 9” tall. Each block weighs around 75 lbs., and you just stack them on top of each other to build a wall. One manufacturer told me a ballistic rubber bullet trap for the average home range is 10 blocks high x 10 blocks wide, and each block can take about 5,000 rounds. After you get around 5,000 rounds on the same block, you simply swap the blocks around.

I’m planning for my bullet trap to be around 10 feet wide and 9’ 9” tall, which would require 65 blocks. If I got 5,000 rounds out of each block by swapping them around, this solution should last over 300,000 rounds. I usually fire less than 5,000 rounds per year total (most at long-range, not at 100 yards), but even if I doubled that with this new range being right at my house and fired 10,000 rounds per year at 100 yards – this bullet trap could last up to 30 years!

Here is a demo video of a ballistic rubber bullet trap: .
I got a quote for 65 Dura-Bloc delivered to my location for $6,206. So, it’s not cheap, but it is less than a lot of the other options and seems like the least hazardous to my health. Once I decided to go with rubber blocks for the bullet trap, it allowed me to shrink the size of the target room because these only need roughly 1 foot of depth – compared to 8 feet for a steel trap or 15 feet for a rubber berm. That cost savings resulting from the reduced room size is significant since this is entire range is underground.

In addition to the rubber blocks, I also plan to mount a 1/2 inch thick AR-500 steel plate to the wall behind the blocks. That would be my fail-safe, in case I ever shot more in one spot on a rubber block than I should have, and a bullet penetrates all the way through. I’m not sure if that should be a genuine concern or not, but I figured it would be better than having damage to the concrete wall. I plan to drop an 8’ wide by 9’ tall piece of steel in the room using heavy equipment before the framers start building the roof of the target room.

If you guys have any tips related to bullet traps or recommendations for the brand of ballistic rubber blocks, please leave them in the comments.

Electrical & Lighting​

I’ll briefly touch on what I plan to do for electrical and lighting down the tunnel and in the target room. I plan to run power in conduit from the basement through the tunnel to the target room. I plan to weld L-brackets to the side of the pipe to support the conduit, and might place those support brackets every 10-15 feet. I figured running the electrical on the side would reduce the odds that I’d accidentally hit it with a bullet one day.

I plan to do LED lighting in 10-yard increments through the tunnel. I plan to weld a bracket to mount a light to at the top of the pipe. I’m not sure what kind of lights I’ll use, although I’d like them to be low profile to reduce the risk of a bullet impact. This lighting is simply to keep me from tripping in the dark when I walk down the tunnel, and I’d keep them off while shooting. I initially thought I might do a wood platform/walkway in the bottom of the tunnel, but honestly, it is easy to walk in with how much corrugation this pipe has.

I want bright, even light on the target, so I plan to mount a few LED strip lights in the target room on the same wall as the tunnel to point directly at the target. I haven’t researched what lights those should be. I thought if I had outlets in the target room that flip on/off with a switch in the shooter’s room, that would give me the most flexibility to add/change lights in the future without having to hardwire them and still be able to control all of them from the shooter’s position.

Lighting Diagram for Target Room
 
Last edited:
Very cool. Lots of thoughts about noise, but my most basic thought is that he should have built it 10 yards longer to accomodate shooting at 100 meters.
 
His waterproofing plan is terrible. If you seal both sides, when one leaks you’ve trapped the moisture and don’t know it. He should dig under the pipe junctions and finish from the outside while he can. Besides, that mess on the inside would be a tripping hazard.

I’d be inclined to replace the blast door concept with a wall, and then put in a door to access the tunnel. A 1 foot tall 4” wide hole in the wall is plenty for shooting, and adding a tube with lining that with sound/pressure absorbing material, would do far more good than a moveable plexiglass contraption. Also gives him a handy place to mount equipment, switches, monitors, etc.

Maybe I’m just hyper critical.
 
Be sure to monitor the rubber blocks for fire smouldering with in. From experience anything can burn , generated heat from bullet. First hand with a Super Trap chopped rubber berm. usually the debri from paper targets contribute. Thank you for posting that, pm me if any questions on the range happy to help. Also Bragg has a few rooms set up with the blocks and they are sweet.
 
Duncan's Outdoors in Bay City, MI.

[4] underground range tubes. A single, common room with a bench at each tube opening. [2] for 50 yd, [1] for 100 yd, [1] for 200 yd.

 
Interesting. Have heard of other UG pipe ranges. Clark Custom shoots in an above ground RCP pipe to 50yds.
 
I bet the project would have been a lot cheaper to build above ground rather than below.
 
I bet the project would have been a lot cheaper to build above ground rather than below.
he said that someone told him that the heat difference from the top of the tube to the bottom caused mirage problems. Even so, it would have been tempting to drop the tubes on the ground, attach tents at each end, and see how it worked just as a proof of concept.

in his part of TX the rattlesnakes are gonna love that buried tube.
 
Cool project. I think I would have handled the potential for water intrusion differently, and spent more effort on sound dampening. I am sure it will be an effective laboratory, but I cannot see this being a "range" as in I would not go there to shoot for fun.
 
I'll bet @Michael458 has a few thoughts.

I am still looking at it overall......... but looks fine to me really for what he wants to do..... and his location........ I love underground, hidden and out of the way sort of things, but I think I would get a little phobic working in the tube......
of course here in most of the coastal plain of the Carolinas, underground is just not an option, submarine maybe......... I like the shooting room fine....... All is a pretty good "Fall Out Shelter" too.... LOL........

but I cannot see this being a "range" as in I would not go there to shoot for fun.
Yeah, neither is mine...... mine is also set up as mostly a test facility as well........ @BatteryOaksBilly and some of the other boys once stated..... "Michael has figured out a way to take ALL the fun out of shooting"........ LOL.........

I tell you what I do like about this entire thread and post....... The Link to Range Systems........ I see some great things they might have there that I can use here...... I can see a use here for those rubber bullet stopping blocks......... and some other things they have..... I am going to do some more research there........ Thank you for the entire post @Get Off My Lawn, interesting stuff...........
 
The tires we have here are bullet proof. One row of these tires and a row behind them to plug the spaces and you are Done. They weigh over 500 pounds apiece and a double row will take up 10 feet front to back. Some are 5 feet tall. A 20 wide range will only require 7 tires. The tires are FREE.
 
They weigh over 500 pounds apiece and a double row will take up 10 feet front to back
I don't believe I can fit those in my Impact Boxes............... LOL.........Might not even get them in the door? HEH..................

I am always looking for a better mousetrap (pun) for my impact boxes............. right now I have them full of chipped up rubber, which is working pretty good, but a block or two of the stuff from Range Systems looks interesting........I used plain old dirt as the main bullet stopping for my range, before the roof was put on, we put I believe it was 5 tons in, block retaining walls are 17 ft across and 10 feet deep. The block retaining walls are double block filled with concrete. Block Retaining wall across the front is 3 ft high, and then a wood retaining wall above that to keep everything in. The impact boxes keep most of the dirt/dust from flowing out, but the rubber chips really keep that down to nothing. Fronts of the Impact boxes are replaced when needed. Works fine, now there is more brass, copper and lead in the retaining boxes than dirt............ LOL..........
 
The tires we have here are bullet proof. One row of these tires and a row behind them to plug the spaces and you are Done. They weigh over 500 pounds apiece and a double row will take up 10 feet front to back. Some are 5 feet tall. A 20 wide range will only require 7 tires. The tires are FREE.
if we continue to live here, i'm gonna have to clear out some trees and get me some of them tires. keep me on the short list of people who want spares, please.
none of my neighbors mind me shooting as long as i'm shooting straight into that corner of my property. they get a little nervous when i start shooting at different angles, but they hear my steel targets ringing enough that they're not too worried about strays. A few of those tires might save me the trouble of having to build berms.
I have 2 occupied structures to the north west within 200yds, 2 to the south east. nearest structure "in the line of fire" is about 1000 yards away behind enough trees that you can barely see deer standing 10 feet in, right now when there are no leaves.
1640808997520.png
 
if we continue to live here, i'm gonna have to clear out some trees and get me some of them tires. keep me on the short list of people who want spares, please.
none of my neighbors mind me shooting as long as i'm shooting straight into that corner of my property. they get a little nervous when i start shooting at different angles, but they hear my steel targets ringing enough that they're not too worried about strays. A few of those tires might save me the trouble of having to build berms.
I have 2 occupied structures to the north west within 200yds, 2 to the south east. nearest structure "in the line of fire" is about 1000 yards away behind enough trees that you can barely see deer standing 10 feet in, right now when there are no leaves.
View attachment 416199
Contact local road & construction contractors to let them know they can drop large tires off.
 
Back
Top Bottom