woodshed upgrade ideas

Jayne

Just here for the memes
Charter Member
Supporting Member
Multi-Factor Enabled
Joined
Dec 16, 2016
Messages
8,028
Location
Unincorporated Wake County
Rating - 100%
34   0   0
Our old 12x12-ish wood shed has seen better days and I at least need to put a new roof on it. I've got lots of tin salvaged off the barn re-roof so no issues there.

What I can't decide on is the floor. Currently it's just a dirt floor and I have some half ass wood racks setup in it that eventually fall over over the course of the winter as I pull wood off. Ground gets soft I guess and they lean and fall.

I have a bunch of deck boards I salvaged when rebuilding the deck, so I was thinking I could just make an actual raised wooden floor (vs. pouring concrete or trying to gravel it) because it would reuse a lot of material I have on the salvage pile.

Should I:
A) 2x4 ground contact frame and put the boards on that, just leveling the whole thing best I can
B) 4x4 posts in the ground, raised 2x6 (or 2x8) frame then boards on top, basically building what amounts to an actual raised (2") deck to stack wood on
C) leave the floor alone and just build mobile wood racks and set them inside the shed as needed
D) something else

"A" seems easy, no posts, no concreting them in, just build the frame right on the ground. The deck boards are from the 80s and hard as iron so I suspect they'll hold up ok being close to the ground. The downside is this could warp over time

"B" would be 100% level since everything will be on posts, but it will cost the most since I have to make it strong enough to hold all the wood with just the contact points of the posts. Advantage is... it's nice? Not sure.

"C" gives me flexibility to move things around, but I feel like it won't solve the actual problem long term

I was also thinking that with A or B I could run 2x4s vertically up from the floor to the ceiling and use those as the ends of my wood stacks to let me build them higher. Probably screw those in after the fact so I could unscrew them and move them (vs. running them through the deck surface into the frame).

woodshed_fail.jpg

Tagging the usual crew for some nonsense input: @NKD @Slacker @Sneakymedic @Scsmith42 (although he'll tell me to make it out of some crazy Peruvian hardwood or some such)
 
Last edited:
In mine it is nothing fancy but was started well before my time and works so haven’t changed it for couple reasons. It is just dirt floor with cedar post laid down for runners to stack wood on to get it up so air can get around it. If it sits on ground you will have rot/ insects or termites if it gets damp so the runners allow it dry. Also like the fact I can pick up post and park other things in the shed when not full or clean it out easily if need be.

If you did a elevated wood floor i would think it would try to sag over time from weight of green wood since it gets heavy quick.
 
  • Like
Reactions: S4f
Mines just feather edged board on a 2,x4 frames ,dirt floor, tin roof,nothing fancy but it works
 
images

Concrete pier and some treated 2x whatever you have laying around.

Bury them till they are level and the rails are just above the ground.
 
If it were me, unless I was itching to rebuild the entire thing I would:
1 - jack up the mid span of those beams and sister a couple of 2 x 12’s on them to eliminate the mid span sag.
2 - remove everything from inside the woodshed, remove the top 12” or so of topsoil inside and backfill with ABC (crusher run), to a point where it is a few inches above grade. Compact the entire area.
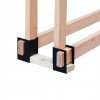
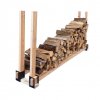
3 - install some type of permanent posts to support the ends of your firewood stacks, or use the metal end posts that sit on 2 x 6’s.
 
Whatever you decide to do remember that snakes, bugs, dragons and Unicorns love a wood shed. Don't purposely create a perfect environment. Either slam the rack to the ground or leave it high enough to be able to see under and/or around.
OR...... get rid of whatever burns all that wood and call the propane and propane accessory salesman....;)
 
Whatever you decide to do remember that snakes, bugs, dragons and Unicorns love a wood shed. Don't purposely create a perfect environment.


That's what I was thinking, wouldn't be a smart idea to make a snake palace to match the chicken palace.
 
Last edited:
I like stacking wood on pallets, so that moisture from the ground doesn't become moisture in your firewood, and you will season wood faster.
 
If it were me, unless I was itching to rebuild the entire thing I would:
1 - jack up the mid span of those beams and sister a couple of 2 x 12’s on them to eliminate the mid span sag.
2 - remove everything from inside the woodshed, remove the top 12” or so of topsoil inside and backfill with ABC (crusher run), to a point where it is a few inches above grade. Compact the entire area.
3 - install some type of permanent posts to support the ends of your firewood stacks, or use the metal end posts that sit on 2 x 6’s.

I like #1 and #3, but #2? 12" uh.... I'm lacking in the back hoe department.
 
images

Concrete pier and some treated 2x whatever you have laying around.

Bury them till they are level and the rails are just above the ground.

if I raise the whole works off the ground, then the floor has to be able to support the weight of all that wood. If I lay the treated 2x4s on end and build a subfloor with the edge of every 2x4 directly on the ground then everything is universally supported (by the ground).

Kinda hard to describe, my construction vocabulary is weak. I think I'll prototype it out tomorrow and take pictures. If it's wrong, I can raise the whole thing on blocks as suggested or just take it apart. I don't use nails in anything anymore, screws all the way.
 
I would use something like this and just put a tarp over the wood.

Then wall in the shack, install a woodstove and sit out there (with lugnut) and drink beer while complaining about things.
View attachment 83730 View attachment 83731

I feel like I could build something like that with a little thinking about how to get around the weakness of the wood without those steel bits. And Decker is the one who likes beer, the other two turn their noses up at it.
 
Not sure what I would do but I’d start by correcting that sag like Scott suggests.
I like the gravel idea, too!
 
The sag fix, not sure about how to do that. When I tried that in the back the entire roof went up and the supports came off the uprights. It doesn't "un-bend", it's probably been like that for 20+ years.

I'm going to do the worst part today, unloading the wood and seeing how off the current dirt floor is from level.
The sag would have to be repaired the same way it got there... slowly. You could get a jack post like for garages and prop it under the sag and every week or so give it a little turn. I did this with the kitchen floor in a 70 year old house before.
 
You can fix the sag by screwing in some heavy duty eye bolts on the bottom of he beam at each end, running a come-a-long in-between them, and mid span place around a 12” - 16” spacer between the bottom of the beam and the come-a-long cable. Tighten the come-a-long a few clicks to put tension on the beam. Soak it with water for a while to help soften the fibers if needed. You might need to retightened over the course of a couple of weeks. Once it is slightly over-corrected, sister a 2x12 onto each side of the beam and then remove the come-a-long.

Similar in concept to this except the bottom chord would be provided by a come-a-long.

7D4723E8-5197-4B17-A97D-0D3923DF57D0.jpeg
 
Be less aggravation to just rebuild it
That's what I'd do.. Right next to it.
Then cut the old building down and use that as the bottom layer of burn wood. Stack the rest on top... Done.
 
I would try to flip the long spans rather than straighten them, nothing wrong with a bump in the roof.

If you’re going to do anything but a dirt floor then rebuilding will probably be easiest. I think your concrete blocks with treated posts is more than adequate as a base, if you think it’s going to sag add a few more blocks.
 
I started working on an idea yesterday, will post a progress report today. Trying to get to a stopping point so I can go to the range but I'm working faster than the charger can keep the screw gun going. The gun, the batteries and the operator are getting tired, and two are easier to buy new at Home Depot than the last.
 
I went with option A. I picked up some ground contact 2x4s and used them for the outer frame and the 2' on center joists, and used some scrap semi-round fence posts for the bridging (new term I had to look up), then used scrap block, brick and concrete to level the frame. Any junction that wasn't on the ground got shored up so there are ~25 or so support 'pillars' to the ground. It's amazingly solid, so much so than anything else I've built to date, probably because there is no more than a 2' span that doesn't have some tie point to the ground.

For the decking itself I used the scrap boards I pulled off the old deck last year. I put them painted side down, thinking whatever 'deckover' that was left on them would act like a moisture barrier and since all the moisture will be coming from the ground side. I had just enough, had to get fancy with adding some sistered joists in and using shorter pieces toward the back but it doesn't look too bad.

It's level left/right, and slopes downward toward the rear. No chance of standing water on it should any blow in around the roof.

Next weekend I'll tackle making the wood holders and getting that roof shored up.

IMG_3440.JPG

I put one board on the front of the 2x4 sill and leveled the dirt back out, you can't even really tell how sloped the ground is from looking at it now. I ran a 1" overhang on the front and sides, and the back is whatever it is since you can't see it I didn't think it was critical.

I tried to keep things level, even, etc and cheated some of the boards to keep them parallel. It was good practice because if we actually build @Sneakymedic a deck in the spring we'll want to do it right since it will be new and we can't blame any errors on anyone but ourselves.
 
Last edited:
Level floor was a bad idea. You now have nothing to blame when the wood pile turns over.

J/k looking good and looks like its coming right along.
 
The batteries on the screw gun are getting really, really tired. I can only build one of those wood holders before the battery dies, and that's like 36 screws.

Anyway, today's progress. Had to split some wood and stack it in that first holder to test the width, the runners are 1' apart. Seems to be about right.

IMG_3492.JPG

Next up (besides ordering new batteries) is figuring out if I can get 3 racks in the middle or only two. Looks like 3 to me but the tape don't lie.
 
The batteries on the screw gun are getting really, really tired. I can only build one of those wood holders before the battery dies, and that's like 36 screws.

Anyway, today's progress. Had to split some wood and stack it in that first holder to test the width, the runners are 1' apart. Seems to be about right.

View attachment 85136

Next up (besides ordering new batteries) is figuring out if I can get 3 racks in the middle or only two. Looks like 3 to me but the tape don't lie.


Looks good are you attaching the holders permant or removeable so you do not have to walk over them? Or are you planning on just one rack on the outside of shed on each side and then the ones in the middle?

Also you were mentioned getting the roof beam back straight you could just keep adding the 1” blocks over time under the post and it should slowly come back straight. Just use a jack with another post on top of it to jack up shed enough to get them under the support post.
 
Last edited:
Looks good are you attaching the holders permant or removeable so you do not have to walk over them? Or are you planning on just one rack on the outside of shed on each side and then the ones in the middle?

Those holders are screwed down and helping hold everything together. I'm doing 1 on each outside and then will do either 2 or 3 in the middle depending on the size of the isle that gives me between the inner and those outer edge racks. If I've got the room to do 3, you won't be able to get to that center one until one of the other 3 in the center cluster is empty.
 
Those holders are screwed down and helping hold everything together. I'm doing 1 on each outside and then will do either 2 or 3 in the middle depending on the size of the isle that gives me between the inner and those outer edge racks. If I've got the room to do 3, you won't be able to get to that center one until one of the other 3 in the center cluster is empty.

Gotcha was just curious since in mine I try to keep splitting and stacking multiple rows on one outside wall and use off the opposite wall that I had preciously split and stacked so I never have to burn what was just split since I try to wait for cooler weather to cut wood each year and allow time for wood to season after spliting. This seems to allow me to have a seasons worth to dry before swapping sides. I just leave a walk way in the middle or park something if wood is low enough. I do not have a front rack on building just rotate directions on end pieces to ty stack together currently to keep it from rolling out and been thinking about doing some type of rack to stack against just to make it quicker stacking since that seems to be my least favorite part but trying to keep it removeable to allow flexabilty. Yours looks low enough and with only one row it wouldnt be bad stepping or reaching over in the center.
 
What are the overall dimensions of that?
 
Back
Top Bottom