You are using an out of date browser. It may not display this or other websites correctly.
You should upgrade or use an alternative browser.
You should upgrade or use an alternative browser.
Electrical boxes
- Thread starter Waterlogged
- Start date
- Replies 26
- Views 501
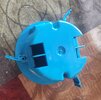
Looks like the perfect situation to use a “smart box”.
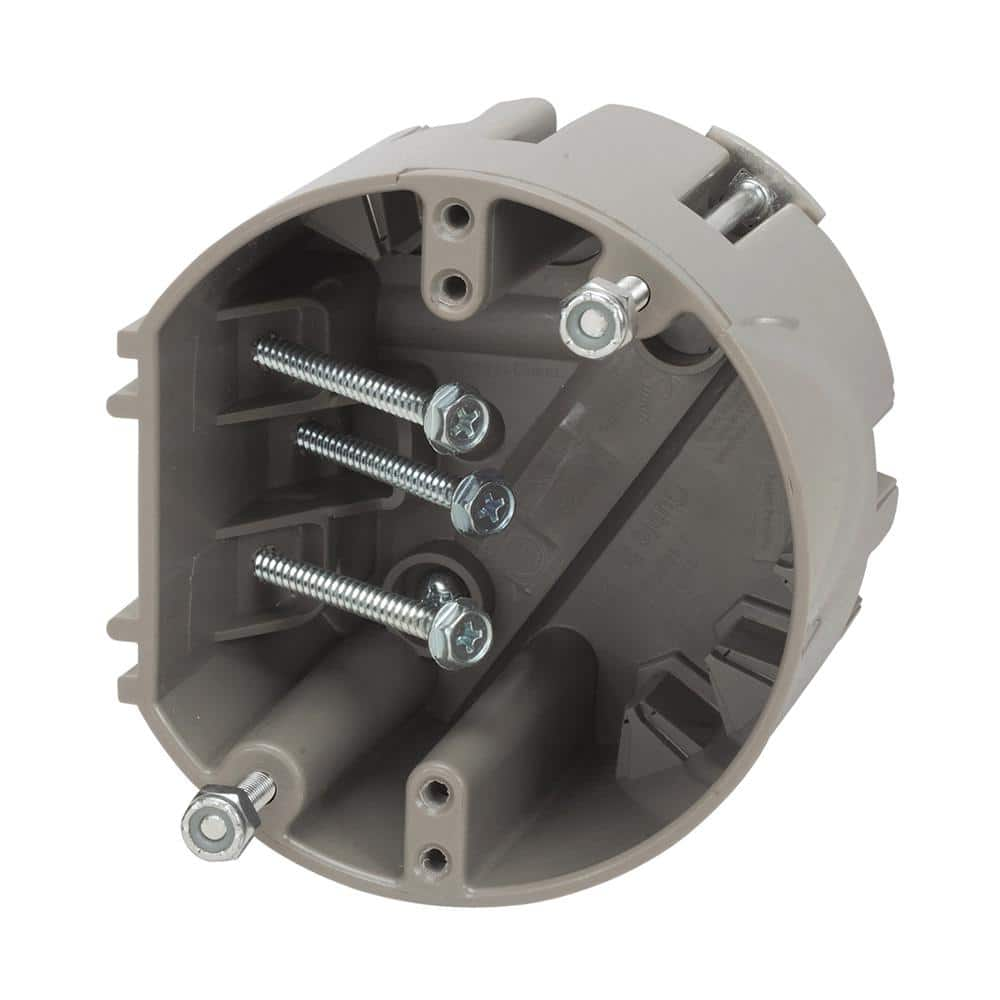

Southwire Smart Box Adjustable Depth 75 lbs. Light Fixture Support/50 lbs. Ceiling Fan Support MSBFAN - The Home Depot
The light fixture Smart Box is a unique ceiling product with a UL listed rating for 50 lbs. light fixture support. It is the only nonmetallic ceiling box that includes two 1 in. #8 fixture support screws.
www.homedepot.com
Last edited:
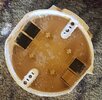
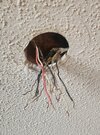
I would be a bit concerned about a fan. The only thing holding it would the tabs against the Sheetrock, and then you have vibration. Sheetrock tends to crack with even minimal flexing (think staircases and doorways). At a minimum, I would want a box screwed into a ceiling joist or otherwise braced.I have one of these, not sure it would support a fan though.
Edit to add, also, don’t break the tabs off where the wire goes. It should press in and then act as a strain relief and also keep the box better enclosed.
Last edited:
Yeah, we were contemplating taking the fan down and just installing a light.
Lazy way out for sure.
I have another fan that did the same thing I still need to repair.
So the box Jerzsubbie posted will work for both.
Lazy way out for sure.
I have another fan that did the same thing I still need to repair.
So the box Jerzsubbie posted will work for both.
Can you get to the space above it? E.g. attic? If so you can put one in that braces.Yeah, we were contemplating taking the fan down and just installing a light.
Lazy way out for sure.
I have another fan that did the same thing I still need to repair.
So the box Jerzsubbie posted will work for both.
The one Jerzsubbie posted will work if the hole is against a joist.
I have used the ones with the brace on others that weren't up against a joist.
I can't get the brace in with the floor there.
Both of these are up against the joist.
I can't get the brace in with the floor there.
Both of these are up against the joist.
pee wee
'Cause we're them old boys raised on shotguns
2A Bourbon Hound 2024
2A Bourbon Hound OG
Charter Member
Supporting Member
Multi-Factor Enabled
If it's just an attic floor, you could drill a pilot hole through the existing opening in your ceiling. Then go to the attic and open up the floor enough to get a proper fan support box in.
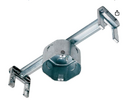
Yeah those are preferred but your existing hole was right on the stud and these won’t let you get that close, so you’d end up having to move your hole over about an inch. It’s still tricky to get everything positioned with only a 4” hole to work with. This is why I recommended that Smart Box.This is what I picked up. I cant get it to work in the space I have.
I can't reach far enough in to 1. Check to make sure I wouldn't be crushing a wire and 2. Push enough insulation out of the way for it to lay flat to expand.
Thanks for all the replies and for looking for a solution.View attachment 734139
Be aware, there are 2 types of ceiling smart box, the one I linked and the one @pee wee linked. The one I linked has a 3rd screw and an L bracket built into it to better handle the load of a fan.
I would not use a standard drywall tab old work box for a fan. I went through all of the options when I installed ceiling fans in all of our bedrooms a couple years ago. It was worth the effort to pull up some attic flooring and dig through insulation to ensure I could securely install cross brace brackets. I used some smart boxes last weekend when adding some outlets in a closet, they’re a little bit more but I really like them.
Last edited:
I did drill a hole in the attic floor from below.
Not going to be able to pull the floor up.
I did drive out to HD to pick some of the boxes up.
They had none, neither did any of the HDs around me.
Ordered some, they will be here tomorrow.
I figure, the old boxes were the normal "nail into the joist" ones and lasted 30years.
Not going to be able to pull the floor up.
I did drive out to HD to pick some of the boxes up.
They had none, neither did any of the HDs around me.
Ordered some, they will be here tomorrow.
I figure, the old boxes were the normal "nail into the joist" ones and lasted 30years.
Thise will not support a fan. This is just for adding a light. Those 3 years is all that's holding it in place.Didn't see those at Lowes
I have one of these, not sure it would support a fan though.
I will go get that one and put the fan back up.
Thanks!!
View attachment 734045
I was only going to go that route if its all I could get to work.
We would have not put the fan back up and just installed a light.
There is another fan about 8 ft away so it wouldn't have been a huge deal losing this one.
Still nice to have two though.
We would have not put the fan back up and just installed a light.
There is another fan about 8 ft away so it wouldn't have been a huge deal losing this one.
Still nice to have two though.
Burt Gummer
May Have Shorter Meme Posting Times Than U Normies
Staff member
2A Bourbon Hound 2024
2A Bourbon Hound OG
Charter Life Member
Benefactor
Vendor
Supporting Member
Salesman of the Year
Multi-Factor Enabled
I bought one of these and had a hard time getting it in the hole. I had to take it apart, and shorten it, put it back together before it would be workThis is what I picked up. I cant get it to work in the space I have.
I can't reach far enough in to 1. Check to make sure I wouldn't be crushing a wire and 2. Push enough insulation out of the way for it to lay flat to expand.
Thanks for all the replies and for looking for a solution.View attachment 734139
Just to ask what might be a stupid question, and admittedly nobody wants to go there (but going through a renovation that removes 80% of it, I’m less skittish) how hard would it be to cut out the Sheetrock, do a proper braced box, and patch and paint the ceiling?I was only going to go that route if its all I could get to work.
We would have not put the fan back up and just installed a light.
There is another fan about 8 ft away so it wouldn't have been a huge deal losing this one.
Still nice to have two though.
Just to ask what might be a stupid question, and admittedly nobody wants to go there (but going through a renovation that removes 80% of it, I’m less skittish) how hard would it be to cut out the Sheetrock, do a proper braced box, and patch and paint the ceiling?
I thought same at first glance but his challenge looking at the picture is the popcorn ceiling. Blending it is not as easy as if it was just drywall.
It's a popcorn ceiling.
Hahaha, if you could see the ceiling in my house right now from other things I have done you would chuckle to yourself and shake your head.
Not doing that again.
I would gladly lose a fan.
Hahaha, if you could see the ceiling in my house right now from other things I have done you would chuckle to yourself and shake your head.
Not doing that again.
I would gladly lose a fan.
Understood. As I’ve mentioned, recent renovation. One of the things that they did was put Sheetrock over the old popcorn ceiling. Even with an attic that was floored, they still left as much of it in place as possible and I lost 1/2” room height. They didn’t want to mess with it if they didn’t have to. *I thought same at first glance but his challenge looking at the picture is the popcorn ceiling. Blending it is not as easy as if it was just drywall.
On the positive side, we discovered when they built the house they put 1x4 furring strips orthogonal to the joists, so that the Sheetrock wouldn’t develop “joist warp”.
(*) one of the things I wanted to do was insulate the interior walls for noise. Instead of taking it all down, we cut channels mid way and at the top and pumped insulation in. The Sheetrock crew, came in, looked at and said, “easier to replace whole sheet than patch” and dumped all the insulation into the room. Oops. They stopped at the one wall and we put batts in it instead, but they patched the rest.
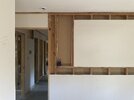
We had talked about putting another layer of sheetrock over the popcorn. Looks so much better I bet.
Did they knock it down any to smooth it out before installing?
Did they knock it down any to smooth it out before installing?
Not unless necessary. There were a few places, like where walls got moved, but for the most part, they just covered over the popcorn, even though falling insulation wasn’t an issue. it looks like they had some kind of rock wool in there as well, but hard to say. We added some blown in insulation to the attic as well.We had talked about putting another layer of sheetrock over the popcorn. Looks so much better I bet.
Did they knock it down any to smooth it out before installing?
Overall, it makes for 1” thick Sheetrock. Not sure how this impacts electrical boxes and light fixtures, which quite frankly I’m curious about, I suspect since it’s a non flammable and enclosed, surface area it doesn’t matter.
We took down a lot of paneling and things, overall about 80% of the exterior, which we then re insulated with modern materials. We also decided to take down the walls of the main bedroom which is the NW corner of the house (summer sun, winter storms) and the GC’s father misunderstood and took down the Sheetrock in another bedroom. Oops. In any case, they both got upgraded from R11 to R15.
Nobody likes to cut a hole in the sheetrock wall or ceiling, but watching a guy take a crowbar and go thump thump thump to find the studs and then pull down whole sheets of it and then ultimately replace it immunizes you a bit.
That and, and I’m pretty good at patching it, having done so getting our old house ready to sell and doing it to a degree you can’t tell.
The “secret” is to gouge out the joint, fill it with mud, and put paper tape over it, press / smooth it down, but don’t put mud on the backside. Let it dry and it will suck the tape into the joint. Then mud the front, minimal is better. If it draws too much out, prime it to block water and then finish it.
Last edited:
"The “secret” is to gouge out the joint, fill it with mud, and put paper tape over it, press / smooth it down, but don’t put mud on the backside. Let it dry and it will suck the tape into the joint. Then mud the front, minimal is better. If it draws too much out, prime it to block water and then finish it."
What this means, at least to me is, don't get in a hurry. When you're working a full time job and only have the weekend for projects it is very easy to try to rush finishing a job.
Now that I'm not working ( retired ) I find that the quality of my finished projects has gone up quite a bit.
.
What this means, at least to me is, don't get in a hurry. When you're working a full time job and only have the weekend for projects it is very easy to try to rush finishing a job.
Now that I'm not working ( retired ) I find that the quality of my finished projects has gone up quite a bit.
.
Oh man my eyes are getting bad.
Got it in and the fan up though.
Box was tight and fairly easy.
Why do seemingly simple jobs always take forever and make me so mad?
Probably because Gator is right about being in a rush. No lights in the kitchen or hallway or outside and stove front display doesn't work.
So many things tied to a 15a breaker.
Thanks everyone.
I appreciate it.
In my experience lowes had a model that was more adjustable than the home depot version. And as far as peeking in there to make sure of clearance and the unknowns, use your cell phone on video with flash turned on so its like a periscope. Or buy an endoscope camera on Amazon.


