A couple members have recently acquired new CZ75 series pistols and have asked me how difficult installation of the 3 Spring Kit from CGW is on them.
The answer is that it isn't hard at all, but folks seem to be intimidated by all the little parts in a CZ. Good news is we don't really mess with any of the tiny pieces for this lol.
I actually get this question quite often, so I decided I would do a step by step tutorial for anyone wanting to do it.
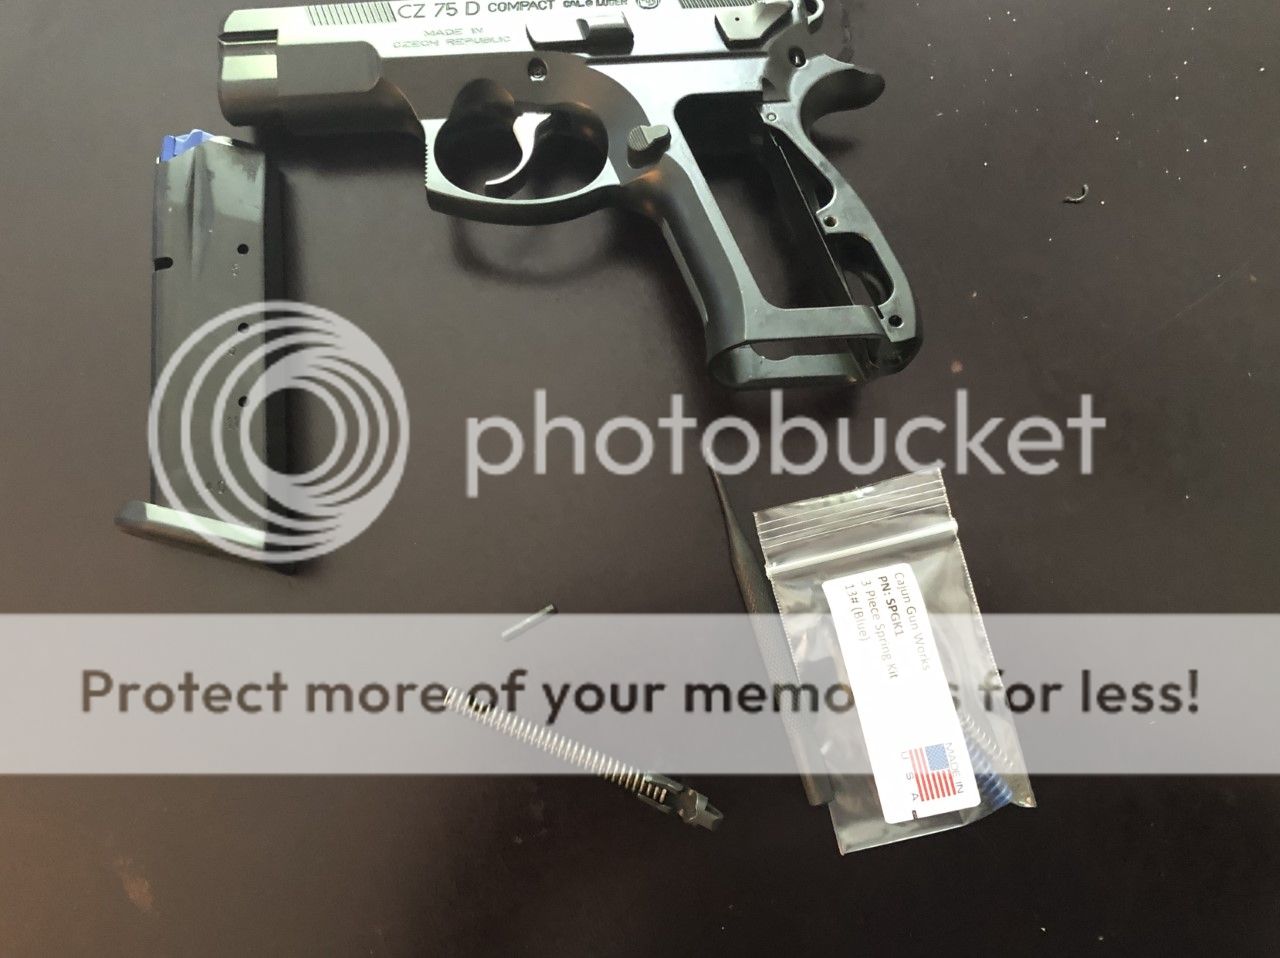
Items needed:
*The gun lol
*The CGW spring kit
*Small hammer
*3/32 (2mm) punch
*Screwdriver (or hex wrench) for grip removal
*Bench Block
Optional, but recomended tools
*1/16 (1.5mm) punch
*Pliers

Start by clearing the weapon, field stripping, and removing the grips to expose the mainspring and magazine brake inside the grip.

The magazine brake is just a thin piece of flexible metal, so reach in with your fingers and pull it towards the front of the pistol until it comes out of its slots at the bottom and swings free. There is a lip/tab that sits under the mainspring, so you might have to put a little oomph into it. More on that lip/tab later.

Some CZs have a lanyard loop and some just have a mainspring plug. Whatever yours may have, the plug pin is held in by spring tension from the mainspring. Hold the pistol vertical, press downward on the plug just a little to relieve the tension, and the pin easily pushes out with the 3/32 punch. Keep downward pressure, remove punch, and slowly release the tension.


Pull the spring and plug out, change spring, stick plug back on, and slide back inside the grip over the hammer strut.
When you reinstall the mag brake and plug pin, the tab on the mag brake is bent to a 90 deg angle and it fits under the mainspring inside the plug. Position shown here.

As you are reversing the process to compress the spring and put the plug pin back in, you must push the plug extra deep into the grip to get that tab where it belongs. Then, as you are carefully releasing the pressure, you must guide the edges of the mag brake into their channels, shown here.

*optional*
The above is what I like to refer as a PITA. Before I put the new spring and plug back in, I just take my optional, but recommended, 1/16 punch, knock out the upper brake pin and remove the brake. I then take the optional, but recommended, pliers and break off that tab. Reinstall brake and upper pin.

It's really easy to manipulate the mag brake back into place now and does not affect function.
Now that the tab is gone and brake is back in its channels, slide spring and plug assembly back over hammer strut, with notches facing front of pistol, hold pistol vertical, compress on table and put plug pin back in.
Set the frame aside and lets get started on the slide.
The answer is that it isn't hard at all, but folks seem to be intimidated by all the little parts in a CZ. Good news is we don't really mess with any of the tiny pieces for this lol.
I actually get this question quite often, so I decided I would do a step by step tutorial for anyone wanting to do it.
Items needed:
*The gun lol
*The CGW spring kit
*Small hammer
*3/32 (2mm) punch
*Screwdriver (or hex wrench) for grip removal
*Bench Block
Optional, but recomended tools
*1/16 (1.5mm) punch
*Pliers
Start by clearing the weapon, field stripping, and removing the grips to expose the mainspring and magazine brake inside the grip.
The magazine brake is just a thin piece of flexible metal, so reach in with your fingers and pull it towards the front of the pistol until it comes out of its slots at the bottom and swings free. There is a lip/tab that sits under the mainspring, so you might have to put a little oomph into it. More on that lip/tab later.
Some CZs have a lanyard loop and some just have a mainspring plug. Whatever yours may have, the plug pin is held in by spring tension from the mainspring. Hold the pistol vertical, press downward on the plug just a little to relieve the tension, and the pin easily pushes out with the 3/32 punch. Keep downward pressure, remove punch, and slowly release the tension.
Pull the spring and plug out, change spring, stick plug back on, and slide back inside the grip over the hammer strut.
When you reinstall the mag brake and plug pin, the tab on the mag brake is bent to a 90 deg angle and it fits under the mainspring inside the plug. Position shown here.
As you are reversing the process to compress the spring and put the plug pin back in, you must push the plug extra deep into the grip to get that tab where it belongs. Then, as you are carefully releasing the pressure, you must guide the edges of the mag brake into their channels, shown here.
*optional*
The above is what I like to refer as a PITA. Before I put the new spring and plug back in, I just take my optional, but recommended, 1/16 punch, knock out the upper brake pin and remove the brake. I then take the optional, but recommended, pliers and break off that tab. Reinstall brake and upper pin.
It's really easy to manipulate the mag brake back into place now and does not affect function.
Now that the tab is gone and brake is back in its channels, slide spring and plug assembly back over hammer strut, with notches facing front of pistol, hold pistol vertical, compress on table and put plug pin back in.
Set the frame aside and lets get started on the slide.
Last edited: