You are using an out of date browser. It may not display this or other websites correctly.
You should upgrade or use an alternative browser.
You should upgrade or use an alternative browser.
M&P rear adjustable rear sight
- Thread starter Geerubb
- Start date
- Replies 21
- Views 2,483
http://www.powerfactorshooting.com/...ar_sight_p/dawson-mampp-adjustable-rear-s.htm

https://www.brownells.com/handgun-p...w-m-p-extreme-duty-rear-sights-prod26782.aspx

https://www.brownells.com/handgun-p...y&utm_campaign=itwine&utm_content=100-017-342

https://www.brownells.com/handgun-p...y&utm_campaign=itwine&utm_content=662-000-070

https://www.brownells.com/handgun-p...w-m-p-extreme-duty-rear-sights-prod26782.aspx
https://www.brownells.com/handgun-p...y&utm_campaign=itwine&utm_content=100-017-342
https://www.brownells.com/handgun-p...y&utm_campaign=itwine&utm_content=662-000-070
Last edited:
OP
Thanks for the info. I got excited from your first link, but they are OOS. I don't want the fiber rear, so I think the Novak may be my only choice right now.
I'm staining my back yard fence right now, but later I'll get with you and type out some of the important finer points of the removal and installation of the M&P rear sight to avoid damage to the slide and it's components. I'm a certified LEA M&P Armorer.
Jeppo
Bold inspired solutions for America 😂
Staff member
2A Bourbon Hound 2024
2A Bourbon Hound OG
Benefactor
Life Member
Supporting Member
Multi-Factor Enabled
Could you post them here too? Inquiring minds wanna know.I'm staining my back yard fence right now, but later I'll get with you and type out some of the important finer points of the removal and installation of the M&P rear sight to avoid damage to the slide and it's components. I'm a certified LEA M&P Armorer.
")
Love2shoot
Stay Gray
Secomd that, im about to flip mine out on my compact in the near future. Is it the safety blocker spring under it? Not sure if thats the technical term lol
Indeed. Have done two.Could you post them here too? Inquiring minds wanna know.
Sent from my SM-G360V using Tapatalk
Step one:
Remove the slide from the frame.
Remove barrel and recoil spring.
Turn the slide over. Looking at it you'll see at the rear, the striker "dog leg". Look closely, you'll see the gap at the front and see a part of the striker spring, also there will be a bit of white plastic showing at the front of the gap.
Insert a small punch into the gap, at the edge of the white plastic and push forward to relieve pressure off the striker back plate on the rear of the slide. You will now be able to remove the back plate. The striker will then pop out a bit.
Look to the right side underneath of the slide and you'll see a small round silver disk. This is the striker safety.
Push this in to release the striker.
Remove the striker from the slide. The striker and assembly *(the white plastic and captive spring come out as one and should remain so).The white plastic is very easily damaged.*
* So be careful with the striker assembly!! ( side note: If the plastic looks familiar, it's because it's the same type as used in household appliances like washing machines. for instance, in the little tab that shuts off the washer when you open the lid.) It's very fragile!*
Now with the barrel, recoil spring and striker assembly out of the slide, there is much less to worry about on the removal of the rear sight.
Turn the slide up right. Okay, this is important, first take a pencil or fine point silver Sharpie and mark the center of the sight front and back(so you'll have a reference point in the center for installation of the new sight.
*Unscrew the set screw ( the small Allen screw in the front of the rear sight) unscrew it, until it is out and off the rear sight completely. (this way there will be no way it can damage the striker safety as the sight is moved left to right & off the slide.)*
There is only one direction the sights are to be removed from the slide: left to right
*(IE: from the "M&P" monogrammed side to the ejection port side!)*
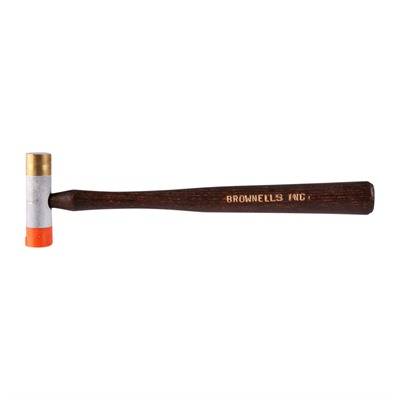
To keep from marring up the sight and the slide get the proper "gunsmith"type hammer with one side brass, one side nylon, like this one, the kind I use at work:
Okay, get a block of wood, lay the slide on its ejection port side down, and the rear sight end hanging off the end of the block of wood. Give good forceful taps with the hammer's nylon side, give good smacks but not any "Hammer of Thor" silliness. The sight will come off the right(ejection port) side. The sight holds the striker safety and spring in place, this is on the top-right portion of the slide under the sight. When it does the striker safety is under moderate spring pressure. It and the spring will come out, so be prepared and roll up a towel and place it where it will catch the safety and spring.
Okay, now to install the new sight. Remember the only way the sight should be returned to the slide, is this time, from right to left.
Since it will be an adjustable rear, you'll need to get a wooden dowel approx. the diameter of a #2 pencil out to a Husky pencil (If you don't know what a Husky pencil, then you didn't grow up in the 1970's! HAHA) This dowel is what you make contact with the base of the rear sight so you don't damage the adjustment assembly.
*(If this were just another fixed sight, you'd just smack it back into place w/ the nylon end of the hammer)*
Set the slide upright and place the striker safety and spring back in place and hold in place with thumb or finger.
*(by the way, no lube should be used in the safety channel, nor in the striker channel. those fragile plastic parts have all the lubricity that the channel needs. keep all things striker related as dry and clean as possible.)*
While holding the striker safety in place with one hand, push the new sight into place from right side(ejection port side) towards the left side with the fingers of your other hand. It should go on far enough with finger strength to hold the striker safety in place. ( However a quick tap from the hammer may be required just to be sure, if you so desire. One never knows about after-market compatibility)
Now lay the slide on it's left side atop the block of wood, and using the dowel as a wooden punch and placed at the base of the sight strike the dowel with the hammer until the sight is seated , centered on the slide. If the sight comes with a set screw, screw it back down in place. Your sight should now be installed!
Okay, return the striker assembly to the butthole of the slide. Holding the striker safety in, gently push in the striker assembly until it's in place. You'll feel it make contact with the safety with a "click".
The end of the striker assembly will stick up a wee bit and will prohibit the full installation of the back plate, but don't worry, just push it in with a pencil as you slide the back plate in place within it's guide slots you'll feel it pass over the edge of the striker assembly and when it does, you can remove the object holding it down as the back plate now has it trapped, continue to push the back plate in place until you feel it "click". The end of the striker assembly is now trapping it in place. They work together under spring pressure to keep each other trapped.
All there is to be done now is to reassemble the pistol's main components and go sight it in!!
PS: When you perform this task, let me know in a PM and if you need it, I can give you my number, as a "phone a friend" resource, should you need a talk and walk through while working.
Best of luck!
Remove the slide from the frame.
Remove barrel and recoil spring.
Turn the slide over. Looking at it you'll see at the rear, the striker "dog leg". Look closely, you'll see the gap at the front and see a part of the striker spring, also there will be a bit of white plastic showing at the front of the gap.
Insert a small punch into the gap, at the edge of the white plastic and push forward to relieve pressure off the striker back plate on the rear of the slide. You will now be able to remove the back plate. The striker will then pop out a bit.
Look to the right side underneath of the slide and you'll see a small round silver disk. This is the striker safety.
Push this in to release the striker.
Remove the striker from the slide. The striker and assembly *(the white plastic and captive spring come out as one and should remain so).The white plastic is very easily damaged.*
* So be careful with the striker assembly!! ( side note: If the plastic looks familiar, it's because it's the same type as used in household appliances like washing machines. for instance, in the little tab that shuts off the washer when you open the lid.) It's very fragile!*
Now with the barrel, recoil spring and striker assembly out of the slide, there is much less to worry about on the removal of the rear sight.
Turn the slide up right. Okay, this is important, first take a pencil or fine point silver Sharpie and mark the center of the sight front and back(so you'll have a reference point in the center for installation of the new sight.
*Unscrew the set screw ( the small Allen screw in the front of the rear sight) unscrew it, until it is out and off the rear sight completely. (this way there will be no way it can damage the striker safety as the sight is moved left to right & off the slide.)*
There is only one direction the sights are to be removed from the slide: left to right
*(IE: from the "M&P" monogrammed side to the ejection port side!)*
To keep from marring up the sight and the slide get the proper "gunsmith"type hammer with one side brass, one side nylon, like this one, the kind I use at work:
Okay, get a block of wood, lay the slide on its ejection port side down, and the rear sight end hanging off the end of the block of wood. Give good forceful taps with the hammer's nylon side, give good smacks but not any "Hammer of Thor" silliness. The sight will come off the right(ejection port) side. The sight holds the striker safety and spring in place, this is on the top-right portion of the slide under the sight. When it does the striker safety is under moderate spring pressure. It and the spring will come out, so be prepared and roll up a towel and place it where it will catch the safety and spring.
Okay, now to install the new sight. Remember the only way the sight should be returned to the slide, is this time, from right to left.
Since it will be an adjustable rear, you'll need to get a wooden dowel approx. the diameter of a #2 pencil out to a Husky pencil (If you don't know what a Husky pencil, then you didn't grow up in the 1970's! HAHA) This dowel is what you make contact with the base of the rear sight so you don't damage the adjustment assembly.
*(If this were just another fixed sight, you'd just smack it back into place w/ the nylon end of the hammer)*
Set the slide upright and place the striker safety and spring back in place and hold in place with thumb or finger.
*(by the way, no lube should be used in the safety channel, nor in the striker channel. those fragile plastic parts have all the lubricity that the channel needs. keep all things striker related as dry and clean as possible.)*
While holding the striker safety in place with one hand, push the new sight into place from right side(ejection port side) towards the left side with the fingers of your other hand. It should go on far enough with finger strength to hold the striker safety in place. ( However a quick tap from the hammer may be required just to be sure, if you so desire. One never knows about after-market compatibility)
Now lay the slide on it's left side atop the block of wood, and using the dowel as a wooden punch and placed at the base of the sight strike the dowel with the hammer until the sight is seated , centered on the slide. If the sight comes with a set screw, screw it back down in place. Your sight should now be installed!
Okay, return the striker assembly to the butthole of the slide. Holding the striker safety in, gently push in the striker assembly until it's in place. You'll feel it make contact with the safety with a "click".
The end of the striker assembly will stick up a wee bit and will prohibit the full installation of the back plate, but don't worry, just push it in with a pencil as you slide the back plate in place within it's guide slots you'll feel it pass over the edge of the striker assembly and when it does, you can remove the object holding it down as the back plate now has it trapped, continue to push the back plate in place until you feel it "click". The end of the striker assembly is now trapping it in place. They work together under spring pressure to keep each other trapped.
All there is to be done now is to reassemble the pistol's main components and go sight it in!!
PS: When you perform this task, let me know in a PM and if you need it, I can give you my number, as a "phone a friend" resource, should you need a talk and walk through while working.
Best of luck!
Last edited:
Thanks for the writeup @SLM.
What's the reason behind removing the striker assembly? Curious because I did not, and I think this is the first time I've seen it mentioned for sight replacement.
Other deviations are using a bronze drift which has a potential for more finish damage but no actual harm and I prefer a soft jawed vise to a benchtop, though I have done both on various pistols.
Sent from my SM-G360V using Tapatalk
Thanks for the writeup @SLM.
What's the reason behind removing the striker assembly? Curious because I did not, and I think this is the first time I've seen it mentioned for sight replacement.
Sent from my SM-G360V using Tapatalk
Eh, when I went to the S&W armorer's school it was stated it was best to have the striker assembly out of the slide, so there would be no way any damage could come to the fragile assembly during the removal and reinstallation of the rear sight in regards to there being odd pressures placed on the striker safety wobbling a bit with the lateral movement of the sight, especially if one did not completely remove the set screw.
My instructor was very very "attention to detail" oriented and demanding. To successfully complete the course one of his requirements was that we would have to completely disassemble the pistol, then at the sound of the whistle, we'd have to have it back together in 4 min or less. A tough instructor, but I wouldn't have it any other way!
Last edited:
Slosolo2
Here to be happy
How long did this course last?Eh, when I went to the S&W armorer's school it was stated it was best to have the striker assembly out of the slide, so there would be no way any damage could come to the fragile assembly during the removal and reinstallation of the rear sight in regards to there being odd pressures placed on the striker safety wobbling a bit with the lateral movement of the sight, especially if one did not completely remove the set screw.
My instructor was very very "attention to detail" oriented and demanding. To successfully complete the course one of his requirements was that we would have to completely disassemble the pistol, then at the sound of the whistle, we'd have to have it back together in 4 min or less. A tough instructor, but I wouldn't have it any other way!
Generally the initial course is two days and the recertification is one day. I'm hoping to get to the Shield course in the near future.How long did this course last?
@drypowder has some techniques on how to properly heat rear sight for extraction.
It involves lots of heat and melting of partz
It involves lots of heat and melting of partz
I should mention, that even though the striker assembly is out of the slide, there is still a sleeve of the same kind of "white household appliance plastic" (my slang, not a technical term) lining the striker channel inside the slide. Soooo yeah, directly applied heat probably isn't a good thing...@drypowder has some techniques on how to properly heat rear sight for extraction.
It involves lots of heat and melting of partz
Once you've the striker assembly out, shine a flashlight and take a look...this type of plastic parts being in a service type weapon troubled me for a long while, but after over a decade of service, I've seen zero problems in many tens of thousands of training rounds, attributed to this striker assembly/slide set-up.
When I went through NCJA's (N.C. Justice Academy's) SWAT course on the last occassion, I used a M&P40, in one day, firing well over 750 rounds w/o cleaning, in the rain & mud, w/ zero stoppages...dropped mags that got muddy, were cleaned by sloshing them through water that had ponded up in old buckets and such, no problems with them either.
The standard M&P may not have a very good trigger, nor are they the most accurate service pistol out there, but I've seen them (literally) "used hard and put up wet" and keep on truckin'.
Last edited:
drypowder
Les Deplorables
There are a few plastic bits that can be melted if overzealous with a heat gun to heat up loctite: the striker spring guide (that's the sleeve you're referring to), the striker assembly has a couple of plastic bits which are not sold separately from the striker assembly, and the slide end cap assembly. Fortunately, all these parts are fairly inexpensive . . . or so my idiot friend with the heat gun fetish tells me.I should mention, that even though the striker assembly is out of the slide, there is still a sleeve of the same kind of "white household appliance plastic" (my slang, not a technical term) lining the striker channel inside the slide. Soooo yeah, directly applied heat probably isn't a good thing...
Last edited:
Yeah S&W quit selling the individual parts of the striker assembly when they updated the striker assembly from the older black (sorry I can't remember the proper nomenclature and my manual is at work) to the new design a few years ago. Now S&W only sells the complete assembly,,.It's very inexpensive.There are a few plastic bits that can be melted if overzealous with a heat gun to heat up loctite: the striker spring guide (that's the sleeve you're referring to), the striker assembly has a couple of plastic bits which are not sold separately from the striker assembly, and the slide end cap assembly. Fortunately, all these parts are fairly inexpensive.
There has been several small internal improvements that have taken place since the first gen pistols.
Quite a few very important improvements have taken place with the 2.0 series. Those are first rate service pistols! I believe they are what the M&P should have been from the get-go.
The instructions are great, but a sight pusher make the job a lot easier... I jut got a chap one for $20something on Amazon and it's been used on several M&Ps and Glocks instead of drifting them out with a hammer and nylon or wooden punch, makes the whole job a lot less stressful and if you are installing non-adjustable sights, the pusher makes sighting in a lot easier.
This is the pusher I got, but you can find it for a few $ less if you poke around:
https://www.amazon.com/Ultimate-Arm...8&qid=1509896909&sr=8-4&keywords=sight+pusher
Have Fun....
This is the pusher I got, but you can find it for a few $ less if you poke around:
https://www.amazon.com/Ultimate-Arm...8&qid=1509896909&sr=8-4&keywords=sight+pusher
Have Fun....
Who makes a rear adjustable rear sight for a m&p? I did some searching and people pointed to Dawson, but I don't see it listed on their site anymore.
They stopped making them some time before January 2016. I have two of them and when I emailed at that time to ask about where to buy another one, the response I got was
The sights will be redesigned and offered at a later date. We've no ETA when Mr Dawson will make the new sight.
Please feel free to look at our fixed sight sets that come with our perfect impact guaranty.
Give them an email ([email protected]) and see what they say the ETA is now. But unfortunately I wouldn't hold out hope.Please feel free to look at our fixed sight sets that come with our perfect impact guaranty.
This is actually one of the reasons I ended up switching away from M&Ps for USPSA and IDPA to a gun that comes with a factory adjustable rear.
...
This is actually one of the reasons I ended up switching away from M&Ps for USPSA and IDPA to a gun that comes with a factory adjustable rear.
I've gone the other way on my competition guns for USPA/Zombie/Etc, I stopped using adjustable sights as just one more thing to break. I always shoot the same load, so I center the sights and if needed change out or file for height and nothing changes after that. My 30+ YO .45 will still shoot a 100 bullseye (from a rest, not me
My M&P shoots close enough to point of aim for USPA distances that adjusting the sight never comes to mind