Making Professor Parabellum proud…

dbarale

Well-Known Member
Joined
Oct 31, 2017
Messages
865
Location
Asheville, NC
Rating - 100%
19   0   0
Ok, probably not.

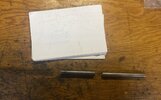
I have wanted to try building my own “gun” for a while. A long time ago I got a piece of 223 barrel from someone, maybe @COLTIMPALA , but I never did anything with it.
Lately I’ve been really busy and I have a million things I should be doing, so what better time to start a useless, time-consuming project?

I’m using the “plans” from the DYI sheet metal derringers publication. From the get go I messed up and used one set of prints that are exact scale, and one that is not. So I have parts that are of two different dimensions. That should make it easier. Not.

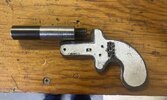
I spent the first two hours scrounging crap around the garage. I found enough for the sideplates, breech, and barrel lug.

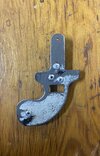
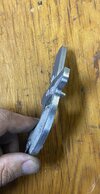
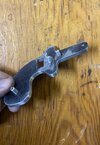
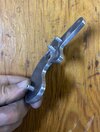
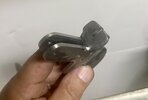
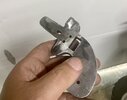
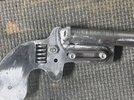
I rough cut the sideplates and welded them together so I could drill and shape them.
300EB84C-D61E-4800-B1F7-3C80FF78F23B.jpeg

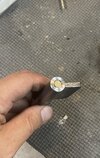
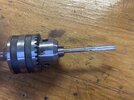
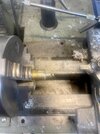
In that picture I had already started turning down the barrel. I originally thought about modifying the design and making a threaded breech, using the threaded portion of the barrel to hold it. I eventually decided to follow the plans for the first one. That may change on the next build.
 
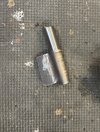
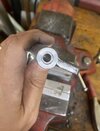
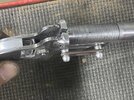
I cut a flat on the barrel for the lug, using the mini lathe to broach it with the back end of a cutting tool. It was well beyond the poor lathe’s design parameters and I could feel it flex and bind. But it kinda worked.

C5F3FDDD-CBD8-4CBF-9E51-42214C79AE16.jpeg

I turned the rest of the barrel down and put an 11 degree crown on it because why not?

5C0D36F7-FBC8-435A-9F4F-F3C7F0F786DA.jpeg

To be continued…
 
I had an hour in shop yesterday so I decided to cut and weld the breach. That went well, not.

I cut the first one according to the “plans” I had (really a rough drawing by a drunk, blind, epileptic monkey), and it ended up being too small.

So I recut it much bigger and fitted it so it would maintain the 6mm of spacing between the two sides that I needed.

Then I welded it, kinda. I only have a stick welder which is fine but the small rods that I should have used for that project were MIA. They’re in the garage, somewhere… No problem, just use bigger rods. Only they were not as dry as they should have been.

It’s not a big deal, just stick them in the oven for a half hour, right?

Not me! I will just crank up the amperage and hope for the best. And by the way, the battery on my welding helmet was dead so I ended up using the plastic welding mask that came with the welder, 20 years ago.

Needless to say the results were sub-par:

65778D85-8511-48DC-9415-E72A4C465362.jpeg0A3D46E4-AAC5-435E-A77B-5AE89FF5810E.jpeg

By some miracle though I managed to keep everything square and straight, and the holes still line up perfectly. So there’s that.

I also got my “chamber reamers”’in the mail. Really just 5.7mm reamers from Amazon. We’ll see how badly I can mess up the barrel with those.
 
Since the last welding disaster I had plenty of time to fix my helmet and get new rods. So I didn’t.

I welded the barrel lug using the same wet rods, and subsequently got equally crappy results as the last time. But it’s on straight and won’t fall off. Hopefully…

IMG_5704.jpeg
After that I used my super high quality $10 Amazon reamer and cut the chamber. It actually worked really well and I was able to get a nice fit with different ammo that I had laying around. I also cut a recess for the rim, and cut it a bit wide in case a case gets stuck.
IMG_5703.jpegIMG_5705.jpegIMG_5707.jpeg
 
I used some scrap aluminum to fill the gap in between the side plates in the grip area. It’s JB welded in place and it will be drilled and tapped to secure it and provide a mounting point for the grips.

IMG_5706.jpeg

Then came the job of drilling the lug and mating the barrel. I took my time and it came out surprisingly good. It’s tight with no play. I have shot break action shotguns that were way worse than this. I also found a random spring that was almost the right size. I just had to enlarge the window a bit.

IMG_5708.jpeg

The proof of concept for the barrel latch. It works. I just need to refine it a little.

IMG_5710.jpeg

Next will be cutting and fitting the hammer and trigger. I suspect that will be the most challenging part because the sear angles have to be just right.

IMG_5709.jpeg
 
Last edited:
A three corner file comes in handy for the sear notch. Those little needle file sets at lowes or HD will have small one in it.

It all looks great to me!
 
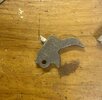
A little more progress, I started working on the hammer. It looks ridiculously large, partly because it is. This was intentional as I wanted to keep as much mass as possible to insure reliable primer ignition, which is vital on a combat weapon such as this. So, yeah, it's fugly, but it fits and engages the spring nicely. Although I am thinking about a little trick to reduce the amount of force necessary to cock the hammer. We'll see if I ever get to that.

IMG_5716.jpeg

One the hammer was made I started on the firing pin. That went very poorly. The design calls for a firing pin made from a bolt that threads through the hammer from front to back. This is really cool as it allows for easy adjustment of the protrusion, and easy replacement when the nose inevitably breaks after 5-10 thousands rounds... The problem is that I did not account for the fact that my crappy welding caused the barrel to sit higher on the frame than planned. This resulted on a firing pin that ended up striking the case perfectly in the center, which would be great for a centerfire. But this is a rimfire.

So after two failed attempts I was able to come up with a design that provided the proper geometry for ignition of a rimfire primer. Unfortunately it is obvious that this design creates high stress points that will absolutely fail quickly. I have started working on a modified pin that will fix that issue but I am stuck waiting for an M4x0.7 die to arrive as I cannot locate the one I thought I had.

IMG_5715.jpeg

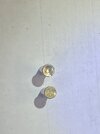
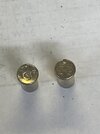
I pulled the bullets out of a few rounds of .22 LR and used the empty cases to confirm primer strike location and ignition. You can see on the "U" marked case how it originally struck dead center and I worked my way to the edge of the rim.
The other case is one of 5 that I was able to light off by holding the hammer back with my thumb and releasing it.

IMG_5717.jpegIMG_5719.jpeg


Now I need to cut the trigger and sear surfaces. Wish me luck....
 
Last edited:
If you can do the center fire trick again, make the next one in 32 S&W. 😉
You can read my mind. I was just wondering if I could use a piece of 308 barrel to make a 32s&w/32acp version?
The barrel would be .004” undersized. That might be too much
 
Cheap 5/16 reamer will give you a smooth bore.

Plenty of 308 barrels have been used for 32 cal. Using lead projectiles is recommended when a 308 barrel is used.
 
Cheap 5/16 reamer will give you a smooth bore.

Plenty of 308 barrels have been used for 32 cal. Using lead projectiles is recommended when a 308 barrel is used.

If I understand it correctly, smoothbore would have to be 18" barrel, 26" overall minimum.


It’s hard to tell from the video but it popped the primer when I pulled the trigger. So, technically I now have a functional firearm, kinda.

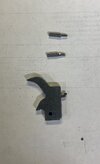
The trigger was fairly easy to cut and getting the angles right was not too difficult.
BUT, I completely forgot that I needed a trigger reset spring and I didn’t cut the spacer between the sideplates to hold the trigger spring. I am going to have to figure something out.

Otherwise the trigger pull is reasonably horrendous. And everything seems to function properly. Now I need to do a lot of finishing, figure out a trigger spring, new firing pin, grips, paint…
 
  • Like
Reactions: NKD
Still tinkering with this. I finalized a much stronger version of the firing pin.

IMG_5738.jpeg

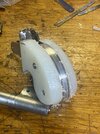
And I started working on some grips.

IMG_5737.jpegIMG_5745.jpeg


I also redrilled the trigger and hammer pins to 3/16” and I am using some cut down Remington 870 receiver pins. A lot less lateral play, and more consistent trigger.
 
A question for the collective, what should I do for a sighting system? Nothing? Brass bead and notch the top of the hammer?

The idiot in me wants to make a mount for a cheap Chinese RDS. Stupid and useless so maybe it would fit this project?
 
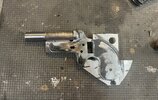
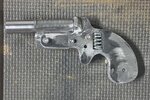
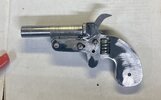
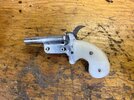
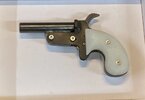
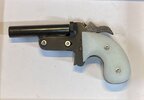
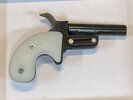
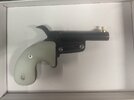
Just a mock up to see what it will eventually look like. The barrel, trigger, and hammer are cold blued. The frame is just barbecue painted right now as it is an easy on and off process. It will be epoxy paint later.
I notched the hammer in preparation for a front sight but the firing pin obstructs the line of sight. I may still put a bead on the barrel just for aesthetic reasons (don’t laugh).

IMG_5758.jpegIMG_5760.jpegIMG_5759.jpeg

First test firing with live ammo is planned for next week.
 
Nice job.

You could solder a rib on top to put sights on. That would get the sight line above the hammer/ pin.

I didn’t use the rib idea but it helped me realize that all I needed to do was raise the front sight to get it above the firing pin. Hang in, we’re going full steampunk….


Brass:

IMG_5761.jpeg


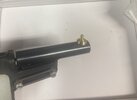
And after a bit of work we have a functional but funky looking front sight.

IMG_5762.jpeg

IMG_5763.jpeg

It’s just super glued on for now. But it held on for two rounds of elephant-stopping 22 short. So, it’s alive!
 
Flatten the sides of the sight base and it won't look like a chess piece.
 
Nice work! I love seeing both you guys' build threads because they show the process from idea through rough-in + oopses all the way to functionality.
Which brings an interesting point. At what point do you abandon the existing design to develop version 2.0, vs. improving what is already there?

I don’t think I am quite there yet, but it’s definitely on the back of my mind.
 
Which brings an interesting point. At what point do you abandon the existing design to develop version 2.0, vs. improving what is already there?

I don’t think I am quite there yet, but it’s definitely on the back of my mind.
Not "abandon," but move up from the working prototype.
 
Which brings an interesting point. At what point do you abandon the existing design to develop version 2.0, vs. improving what is already there?

I don’t think I am quite there yet, but it’s definitely on the back of my mind.
About the second or third build. That's when you start to feel a little cocky and want to "stretch your legs". Thats also about the time you get a little bit humbled because you thought you knew something and this new project starts kicking your butt. So then you watch a few videos of those kyber pass gun builders and get mad because they are turning out functioning AKs in a cave while you can't get the linkage on a lever and falling block to work right. So you take a few of those "Lifetime showers" where you curl up in the fetal position and cry. Then you go back to shop and keep working at it.
 
Last edited:
Which brings an interesting point. At what point do you abandon the existing design to develop version 2.0, vs. improving what is already there?

I don’t think I am quite there yet, but it’s definitely on the back of my mind.
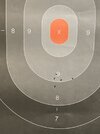
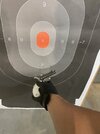
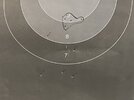
I am there now. Ditching the derringer style and starting on a new version. The goal for this one is to be able to put 10 shots in a 2” diameter at 10m.

IMG_5802.jpeg
 
Back
Top Bottom