You are using an out of date browser. It may not display this or other websites correctly.
You should upgrade or use an alternative browser.
You should upgrade or use an alternative browser.
My Journey with an M37
- Thread starter rdinatal
- Start date
- Replies 105
- Views 3,300
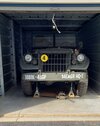
I forgot to ask about this yesterday. Are you not keeping it at the house?
Which unit. I'll test drive it.Not yet, too much going on right now. It's at the storage units on 73 by the dam.
View attachment 639212
And this is why I cropped the picture to remove the unit #! 🤷Which unit. I'll test drive it.
Driving it to the DMV in Newton tomorrow to get it inspected. Seems the 1st inspection on an antique is in person to verify SN on the title.
Last edited:
Got up and out to get up to the Newton Registry for 8:30. In the parking lot, called as instructed...
Summer hours: Tues, Wed, Thurs 8-10
Yeah, a little bit frustrating as I just called to verify the hours last week (M, T, W, 8-10).
It was a nice 52 mile (round trip) drive. Got the squirrels motivated to go 50mph. Comfort zone is 35-45mph.
Try again Wednesday.
Summer hours: Tues, Wed, Thurs 8-10
Yeah, a little bit frustrating as I just called to verify the hours last week (M, T, W, 8-10).
It was a nice 52 mile (round trip) drive. Got the squirrels motivated to go 50mph. Comfort zone is 35-45mph.
Try again Wednesday.
Last edited:
All good plans and all that. Never made it till today. Another 26mi drive but this time I felt comfortable maintaining 45mph. Inspection was limited to the VIN, if it was the same as on the paperwork and readable. The Officer said he would check history and it would take a few weeks to get the title.Try again Wednesday.
I asked about safety inspections. He said it's exempt on inspections but the brakes should be working. 🤦
Just need to register every year.
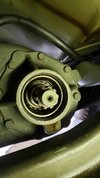
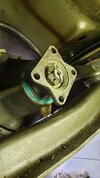
Next: The T-Case rear output shaft seal is leaking more than I want. Picked up a seal and Redi-Sleve to use as a new surface on the shaft flange. Just need a few hours when the heat is below 85 to do it.
Last edited:
Did you say you had an lmtv at one point?
I’ve always wanted one of those suckers. Sling some high speed gears in it and tube it and rock on.
I’ve always wanted one of those suckers. Sling some high speed gears in it and tube it and rock on.
No, just considered one. The size was a detractor since I'm limited to where it is (can be) parked.Did you say you had an lmtv at one point?
I’ve always wanted one of those suckers. Sling some high speed gears in it and tube it and rock on.
Last edited:
The PB and PS kits are in. Today went and drive around a bit then backed into the space in such a way to give room to work on the left front of the truck.
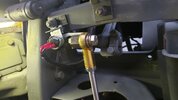
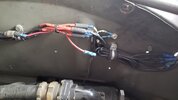
Started to remove the inner fender and other shields for access. The brake pedal needs to be removed for modification. Pictures are for my reference at assembly time.
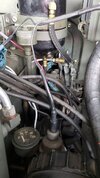
It got to 100 degrees in there at 11:30 so I called it quits for today.
I need to get up early tomorrow to get a couple more hours in before work. I will say it's real nice to have bolts that aren't rusted and caked with dirt/oil.
Started to remove the inner fender and other shields for access. The brake pedal needs to be removed for modification. Pictures are for my reference at assembly time.


It got to 100 degrees in there at 11:30 so I called it quits for today.
I need to get up early tomorrow to get a couple more hours in before work. I will say it's real nice to have bolts that aren't rusted and caked with dirt/oil.
Last edited:
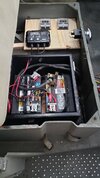
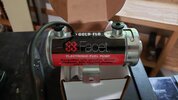
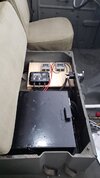
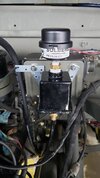
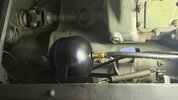
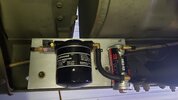
Some work on the future fuel pump and filter. Mounted up inside the frame underneath the bed.
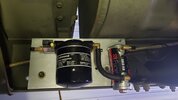
Still need to wire and run the fuel lines. That's one of the final mods, no rush.
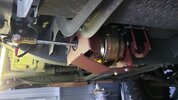
Switched to the output shaft seal since that's on the "Must Do" list. Took the rear driveshaft off. The cotter pin was a bear only because of the angle. The nut was also tough to crack but there's plenty of room to move around under there and get some leverage on the breaker bar.
Found that I left the 2 jaw gear puller at home. 🤨 @#$%&*!!!
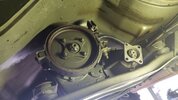

Last edited:
Got the flange off but the seal is proving to be a PITA. Even had Shane (@LeeMajors) take a look. It's moving but not popping out.
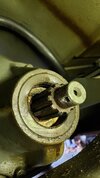
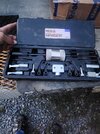
Picked up yet another tool: Seal Puller
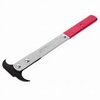

Picked up yet another tool: Seal Puller

Last edited:
We shall see tomorrow. But that should do the trick. It's 75 years stuckGot the flange off but the seal is proving to be a PITA. Even had Shane (@LeeMajors) take a look. It's moving but not popping out.
Picked up yet another tool: Seal Puller
View attachment 674991
heavydoc
The Southern President
2A Bourbon Hound 2024
2A Bourbon Hound OG
Benefactor
Life Member
Supporting Member
Multi-Factor Enabled
I'm sure that's worth the cost for the amount times you replace seals. Looks like it works great.This is my goto for hard to reach/remove seals
View attachment 675022
The only piece I've used in it is the part that a screw fits through to bite into the seal. A few taps with the slide hammer and it comes out.
Carolinatlc
Member
2A Bourbon Hound 2024
2A Bourbon Hound OG
Charter Member
Benefactor
Life Member
Multi-Factor Enabled
I have a similar MAC tools puller set I bought at a pawn shop years ago that is great. Harbor freight has a similar set pretty cheap.I'm sure that's worth the cost for the amount times you replace seals. Looks like it works great.
Prepare for a battle!!I need to do that to both diffs on the M38A1.
The rear axel seal doesn't need to be done but it's getting there. That will be a 'winter' project.
@Inglis
Found some great crush washers for the differential drain plugs. Perfect fit and affordable too:
M22 Flat Washer Copper Sealing Ring, 22mm ID 28mm OD 1.5mm Thickness Metric Sealing Gasket, 20 Pieces https://a.co/d/0v337Qz
Started the engine after sitting for a month. Little choke, zero smoke/smell.
Found some great crush washers for the differential drain plugs. Perfect fit and affordable too:
M22 Flat Washer Copper Sealing Ring, 22mm ID 28mm OD 1.5mm Thickness Metric Sealing Gasket, 20 Pieces https://a.co/d/0v337Qz
Started the engine after sitting for a month. Little choke, zero smoke/smell.
Last edited:
Decided to let the professional install the power steering. My ability on swapping the steering gear/pump is fine. The cutting and fitting the steering column is a bit beyond my comfort zone. There is a lot of repetitive measure and cut. That and my regular work has left little time to wrench.
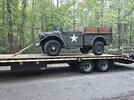
Loaded up for transport to Mseriesrebuild.
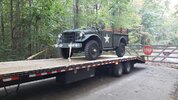
Shane's trailer makes it look small. It's not.
Loaded up for transport to Mseriesrebuild.

Shane's trailer makes it look small. It's not.
Last edited:
Got it back from MSeriesRebuild. The PS was the initial request. While there they chased a few gremlins that I discussed with Charles (owner). The original owner/rebuild installed a few items that weren't in time with the crank: oil pump and distributor, governor. They fixed/adjusted those and adjusted the valves. Now they had vacuum for the brakes but it was low. Found that final leak... No one plugged the vacuum wiper line! It's like a new truck!!!
Not being familiar with how they should run I thought it was just underpowered.
So, on with the other resto-mods.
Next is the electric fuel pump, line, sending unit, and gauge replacement. Since there is a big filter/separator in place the internal tank pickup/filter is due for inspection and modification (deleting the in tank filter and lengthening the pickup tube).
Oh, along with assembly issues I had noticed the tailgate never hung down vertical when not using the chains. There was a center hinge that was binding. And guess what...
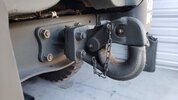
Looks like the pintle hook was mounted incorrectly.
From my research the mounting plate should be inside the frame cross member. The way it is the hook sticks out about 1" more and hits the tailgate.

Last edited:
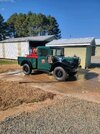
These are not my pictures. I saw your post and knew they were working in this so I asked them to send me some pictures. The next time I go there, I will take seat pictures for you. You can also call them and ask for the mechanic. He enjoyed working on this. It was a military loaner to a local FD and they turned it back in. It was red and barely running but was garage kept. It runs great now.That's the color scheme I want.
@g19 are those your pictures? Can you take some details of the seats (how they're mounted)???
(always looking to steal ideas...)
Started cutting into the original fuel line.
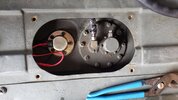
Inspected the sending unit. Found it was open, no change in ohms when moving the float. Replaced, new gasket along with a custom jumper for the different connectors (F to F)
Plan was to replace the pickup filter with a extension to the tank bottom. Since the new primary filter is a removable can the object is to remove any trash from the inside of the tank. Well, there was no filter. The pickup tube ended 1" above the tank bottom. Added a length of 3/8" fuel hose, double clamps, new gasket. Tank is done, on to the line.
The inside of the tank looks good.
Found that the flared fitting on the pickup was not removable. Some type of solder? So, plan B. Removed the 4ft length of alloy metal line from the tank to a junction. Cut about 3" off the end with the best flare/nut (yeah, another new tool). Attached the new 5/16" line, double clamped, attached to the pickup.
Enough for T-Day eve wrenching.
Next:
- Use some plastic electrical loom as abrasion shield on the fuel line runs.
- Plumb into the filter/pump assembly.
- Run the pump output to the secondary filter up at the carb.
- Wire the pump with a oil pressure relay (no oil pressure = no power to pump).


Last edited:
While researching this I discovered that running a feed wire off the switched side of the starter won't work. There is no "normal" relay, just a switch built on the side of the starter.Wire the pump with a oil pressure relay (no oil pressure = no power to pump).
So, Plan B again...
Since the carb is a float bowl (vs. injection) a simple momentary switch will be used to prime the system.
Last edited:
ronn47
Where's the Scotch?
2A Bourbon Hound 2024
2A Bourbon Hound OG
Charter Member
Benefactor
Life Member
Multi-Factor Enabled
Nice!
I’m totally unfamiliar with these vehicles. I inherited a collection of military vehicles and containers full of parts. As I dig around I’m sure I can finds parts or manuals, if I know what I’m looking for. He had a bunch of military vehicles. I don’t know what model this one is he started restoring. I kept and am looking forward to driving this around.
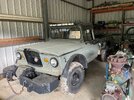
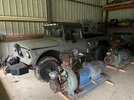
I’m totally unfamiliar with these vehicles. I inherited a collection of military vehicles and containers full of parts. As I dig around I’m sure I can finds parts or manuals, if I know what I’m looking for. He had a bunch of military vehicles. I don’t know what model this one is he started restoring. I kept and am looking forward to driving this around.


Last edited:
That's a M715 in use during the Vietnam War.I don’t know what model this one is he started restoring
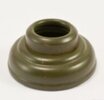
What kind of material are the original ones made of?Anyone have a 3D printer that would attempt to reproduce these? I can remove one for measurements. It's serviceable but has corrosion holes.
A long term replacement idea...
Escutcheon for interior door handles
View attachment 707046

