Next Project: 1965 Ford Mustang Convertible

RacerX

Professional Knucklehead; aka Jeffncs / RacerX
2A Bourbon Hound OG
Charter Member
Vendor
Supporting Member
Joined
Dec 17, 2016
Messages
3,444
Location
Wake County
Rating - 100%
73   0   0
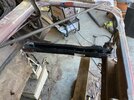
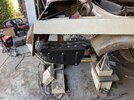
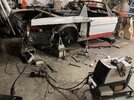
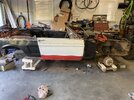
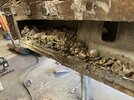
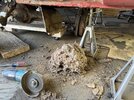
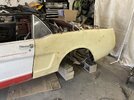
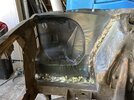
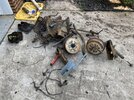
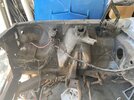
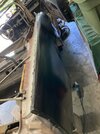
I’m not doing to do a full build story here. I’ll show you a starting point and intermittent updates.

Pickup day from @GregB
5B67899F-C676-457E-B765-D6A38786E098.jpeg
6548D1AD-04E7-4C98-8E9C-2398D6E30252.jpeg


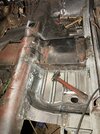
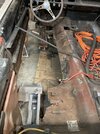
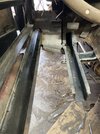
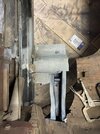
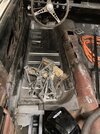
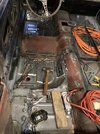
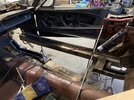
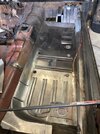
Let the fun begin!! Full floors, floor reinforcements, driver torque box and more steel to come!!
055CD35E-F5C2-4606-B699-7B45AA3175CA.jpeg
 
Last edited:
I have a NOS quarter panel, fender and trunk lid lined up. I’ll track down or repair the remaining fender but the other quarter will also get cut out and replaced.

My vision is a dark red car with white stripes and the black convertible top with American Racing Torque Thrust D rims.

Assuming I can get it running, it was a warmed up 302. The trans will either be a 4 speed top loader or a World Class T5 turning a 9” rear.
 
Project took a slight downward turn…. Engine is seized and oil has coolant mixed. I’m in the market for a 351W or a 302 now.

I’m going to pause on the going too fast on the mustang to get the EFI 4.0 engine into the CJ7. Once that’s done, I’m going to pill the boat anchor and trans from the mustang then start the rust repairs.
 
Owned a '65 coupe and a '66 GT Conv....both K Code 4 speeds. Please, keep us posted.

ooooh.… K codes!!! Hipo 289 and 4 speed toploaders. Bad little rides from the factory!
 
Project took a slight downward turn…. Engine is seized and oil has coolant mixed. I’m in the market for a 351W or a 302 now.

I’m going to pause on the going too fast on the mustang to get the EFI 4.0 engine into the CJ7. Once that’s done, I’m going to pill the boat anchor and trans from the mustang then start the rust repairs.
I'd like to see one with the engine and drivetrain out of a modern v-6 and overdrive transmission.
 
All my projects start off the same way…

rusty hulks in some state of functionality. I take it on as a challenge to make it into something others appreciate. This one will be the same.

I have most of the major rust repair panels sitting in my garage already with a few more arriving this week. She’ll be solid in a couple months then getting straight for a shiny new paint job.

My wife just shakes her head and walks away. She knows it’ll look great once done, but also knows I’ll be in the garage almost every night of the week and all day over the weekends.
 
If he is still around @spittinfire and/or his dad might be able to help you out.

What did I get volunteered for??

Been involved in more than few Mustang restorations other stuff as well. IF you need drivetrain stuff, yes we can help. We have done countless SBFs and my dad is a Tremec dealer among other related products.
 
What did I get volunteered for??

Been involved in more than few Mustang restorations other stuff as well. IF you need drivetrain stuff, yes we can help. We have done countless SBFs and my dad is a Tremec dealer among other related products.
I’ll send you a PM. Engine toast…
 
Couple pics for the fun of it…

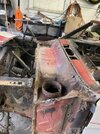
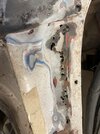
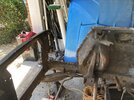
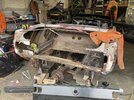
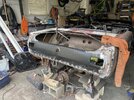
Pulled the engine, trans and pulled apart the front end

8378688A-291D-49BB-B763-4C0C2CC5BD7C.jpeg

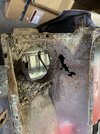
I see daylight!!
988EBE6E-D25F-4ECA-A159-333D654C3B40.jpeg

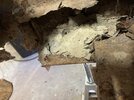
I see even more daylight!
EE4549A5-2AEF-4045-B620-20E2EA6C5552.jpeg

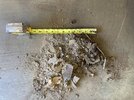
This came out of the fuel tank.
5D853D6F-27DB-46BB-9288-4AB18D8FEFE6.jpeg
 
Last edited:
Spent the weekend removing the inner rocker which is comprised of a vertical, center divider and a formed inner rocker. What a pain…but after drilling out the spot welds, the air hammer help a LOT! After doing some additional steel cleaning and hitting everything with cold galvanize (essentially a weld through primer), I fit the new inner rocker into place.

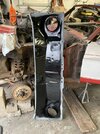
A lot of welding later leaves me with a new inner rocker and torque box. All are fully welded, but I may add a few more seam welds for additional strength.

38474855-F65C-4613-A903-0BCDD820379B.jpeg

I also mocked the new floor panel into place.

EE8356E0-D6BC-4D2E-AC9F-DC8C1A73CF69.jpeg

In order to call the passenger side “finished”, I have to fit and weld the floor, fit a few small panels into place then do the same for the rear floor extension. I should be able to bang that out next saturday.
 
Last edited:
Full length floor, and toe boards all welded in. Also re-installed the seat platform and a new floor reinforcement. I just need to do a little weld clean-up before paint.

I’ll knock out the rear quarter and the inner/outer fender wells next weekend. Once they’re in, I’ll drop the rear floor extension in and call the passenger side finished. Then I’ll spin it around to repeat the whole process on the drivers side.

C07C94F0-A245-44DB-9234-D97708B6BC39.jpeg

Anyone want to pick a car up and spin it around with me? Asking for a friend…
 
Saturday - 11/27

Cut off the passenger quarter
Cut out the rusted parts of the inner and outer wheels wells
Removed the rusty trunk section on passenger side
Cut out the rusted frame rail

Installed new frame rail section (fully welded)
Installed new trunk floor (fully welded)
Fit new inner fender (tacked into place)

A4962FA4-0BD6-4BD3-B258-BEF0806EFE88.jpegF09D66EB-A249-47E4-8DC3-EE9A665318E3.jpegC546BD12-780B-43E1-A68E-50D340B64ACF.jpeg

Sunday 11/28 is set aside to finish the outer wheel well and install the quarter.
 
K5 Hp 289 I use to build those top loaders every day on the 70s

How hard is it to swap the input shaft? My top loader came out of a big block, so the pinion is the wrong length for the small block. I’ve read the main cluster could come apart without the “right took”.

I appreciate your insight here!
 
How hard is it to swap the input shaft? My top loader came out of a big block, so the pinion is the wrong length for the small block. I’ve read the main cluster could come apart without the “right took”.

I appreciate your insight here!
No snicking it out, I assume your speaking of the front main drive gear.
There's "free independent roller bearings that ride the inside main gear pocket and the front main output shaft.
I suggest a complete proper tear down to change parts out. Fresh seals and gaskets, small parts kit etc.
Question? Is yours have the big truck type shaft?
 
It’s been a few weeks since any updates, so I’ll throw one in for the fun of it…

Tasking a pause to do other panels before tackling the drivers side rocker, torque boxes (front and rear), full floors and quarter. Instead, I replaced the rear taillight panel a couple weeks back.

E0EE27B1-6F4D-4C6C-806E-4C1970FAD8EB.jpeg

1BB6481A-F8D4-4550-938E-D4788DD89A86.jpeg


I then fabricated a body dolly to spin the car around to more easily access the drivers side.
Side note for the observant: I’m going to cut the pass quarter off and redo. I’m really not happy with the heat distortion..

D6E274B1-77A6-4464-A55B-7215C558919E.jpeg

Today, I pulled the drivers fender and removed the upper cowl to replace the lower cowl, which came from the factory unpainted! That’s right, these cars started rusting while sitting at the yard in Detroit. The new panel is prepped with weld through primer and painted surface areas.

1A5909ED-FD8B-42D6-8AF9-187A1239DA2C.jpeg

DB0CE6D8-3A9C-40A2-B958-CD05E03FC853.jpeg

21868CED-C33C-4A73-8BEE-6E61EE8A43F0.jpeg

0306E10A-205D-44FA-A762-A3C580F685EA.jpeg
 
Last few days were spent reinstalling the lower upper cowls. Turned out well in my opinion…

CB6F357A-D566-4559-87AE-37DAD4399565.jpegFC1FE91C-BB17-467D-A715-E5DAEF2657C3.jpegA773D5A5-AE35-470D-9078-0F72DA8E450A.jpeg

Next up <and I’ve been delaying this job> is the driver side floors, rocker, front torque box and rear torque box.
 
I found the time to start the rockers, floor and torque boxes in the driver side.

I cut the floors out, cut out the old rear torque box and fit the new one into place. Using flat steel, I added gussets to the inside of the frame rail section for extra strength.

Rocker is half out. I’ll get the rest of it out tomorrow. After some patching, fitting, and general voodoo magic, I’ll get to installing fresh steel. Tomorrow could be a long day!!

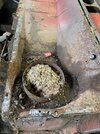
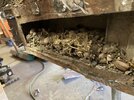
Note the piles of mouse nesting materials, acorns, sand and other nastiness collected over 30 years of sitting.

024B7296-6D31-4A63-80DD-4B7D2F61237B.jpeg3CFD7014-EBCD-46DE-999D-5B32D6C37CC2.jpegDDEEAAE4-BDB5-4939-A454-175EDC3125DD.jpegBCB327B6-7808-4281-B27E-EDE3C36CDF3D.jpegA8D0EA53-F03E-49E8-8EFA-590D9531C012.jpeg633E6743-8887-42D7-9725-5B3254457FBF.jpeg
 
Last edited:
I finally scrapped the old 351w and 3 speed. Once the structure is done, I have a replacement 351w and a 4 speed toploader to go in.

The toploader is about to get torn down, cleaned, meadow blasted parts and housings then rebuilt.

I’m going to drop the engine in as it sits, but aluminum heads and a cam are in its future. I already have an Edelbrock intake and Holley 600 carb. My goal is 400hp at eye flywheel.

I have a lead on an 8” center section with 3.55 gears and a trac-lok. That’ll get me through until I can build a proper 9” rear.
 
Last edited:
You 100% don’t need a 9” for 400hp. There’s 1700hp drag cars running 8.8 rears. Save ya $$
 
These fell out of my trans. Anyone know how it goes back together??? 😉

46C25D03-110D-45DA-B914-6A85E1497CA1.jpeg

Rebuilding my Toploader. It needs a couple new gears and and blocker rings. I have a master rebuild kit that will replace all of the wear parts, bearings, seals and gaskets.
 
Knowing that I was going to take the day off tomorrow, I hit it hard today.

Everything painted (rust treatment or weld through primer), made a frame rail patch and welded that in, welded in the rocker, finished the rear torque box, welded the front torque box in and finished most of the front full length floor. I was BUSY!!

I also ordered some replacement gears and other trans parts.

480A48F6-9CAF-4E02-8B0A-FB98E60C5036.jpegB1603D71-0FB0-411E-85BF-4E9AA119B67B.jpegBA8FC1B8-8569-42F9-A5A1-0135202DFE19.jpeg
 
Last edited:
Busy day today after sledding and hanging with the kids yesterday.

Floors 90% (small panel to be fit and welded in)
Seat platform welded back in
Floor reinforcement welded back in (under floors)
Fit and welded in the subframe connector
Need to hit some of the welds with a grinding disc and may need to touch up a few holes.

055F8EE9-7E55-428B-A1BD-E88A10C87316.jpeg

I have a 9” rear diff coming from SC that should be darn close to bolt-in.

This week, I’m ordering a front performance suspension, new steering linkage and rebuild kit for all moving suspension parts (a-arms, etc.). This order is going to hurt.
 
Last edited:
Who are you using for the front end? I have used both Opentracker Racing and Street or Track for various projects. Both are great to deal with.
I’d love to use either but my budget doesn’t allow it. I’m keeping it simple with the following components:
620# 1” lowering springs
KYBs all around
1 1/8” front anti swaybar
3/4” rear anti swaybar
New 16:1 steering box
Shelby quick steer pitman/idler arm
New upper and lower (stock) A-arms
Needle bearing spring perches
Stock steering linkage

Rear is getting 4 1/2 leaf spring with mid-eye bushings for a 1” drop

Poly bushings are going everywhere possible.

My brother scored a new SS Brake Co disc brake kit for me which is an awesome upgrade to my drums. Includes a dual master cylinder too.

I’m going all the way with this car…. Engine is ready to go and the trans is just waiting for a few replacement gears before it goes back together. The 9” will get cut down and the center section will get a trac-lok carrier with 3.55 gears.
 
Last edited:
Update Sunday 2/13

Cur off the passenger quarter, outer wheel well, trimmed out some rot from the inner and cut out the drop of the trunk drop-off.

Welded in the new trunk patch, fit and welded in the inner wheel well patch and started to fit the outer wheel well and quarter panel. The quarter was cut off another car and is rust free. Nice working woth factory steel! The outer and quarter are just clamped in place. I’ll final fit and weld them into place next weekend.

2D781211-4054-48EE-86D5-B4B26AE8877C.jpeg9DDFF960-F093-48D7-B407-723CCA2907A2.jpegE8B9DD33-D78C-4F7F-B42E-021CF720FE79.jpeg


Found a little surprise in the small panel between the convertible opening and the trunk…. There won’t be a panel left untouched after I finish rust repairs!!


66F73701-DDFA-462B-B7C6-6D0ED750712C.jpeg
 
Once this quarter is done, I’ll pull the door apart to repair the rust (surprise!!). I have redo the passenger side quarter and outer wheel well, but will do the same on that door too.
 
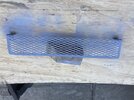
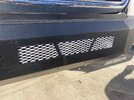
Taking a couple weeks off from the car…. I found myself having fun, but feeling a bit like a labor and that’s not what this is about. Instead, I spent a bunch of time with the kids and wife. I did tinker today and made this for my neighbor’s new bumper on his new Ram.

6D945BCE-AB15-4EF2-9611-66EC0E4778DD.jpegC0CF53D5-ABB3-41F3-B873-2807BC2CDB96.jpeg

I left it primed for him to decide final color. He’s going for a black-out look, so he’ll finish it.
 
Last edited:
It’s been a while since my last update. Lots has happened in both life and this project. I’m trying to source the final parts to complete the body (1 fender, 1 door and Shelby apron).

I purchased a complete (new) disc brake setup and a very slightly used full front suspension / steering system.

I expect to have it rolling on its own weight in a few weeks and possibly under its own power later July. Paint could be laid down Aug.

Redid the passenger quarter, replaced a rusted fender apron and pulled all the old suspension/steering out to wire wheel, rust convert, and prime. I’ll seam seal and paint it all black before the engine goes in.


903BCAD1-8B41-4C75-811E-7030B5189FC9.jpegB9CF967A-15BD-460E-ABE9-0D0E009746D0.jpeg8E82517F-288B-499E-B819-02A090344850.jpegEC12E54C-BEEF-4B23-AAD4-3CCFA6685B10.jpegF8784776-DC46-4508-BA2A-6E8FCEF2384A.jpeg
 
Last edited:
In the process of picking a color…

Doors and fenders are ready to go on. I bought the Shelby fiberglass nose and have a fiberglass hood all ready too.

I could have it ready for paint in a few weeks if I could only find the time!!
 
Last edited:
Back
Top Bottom